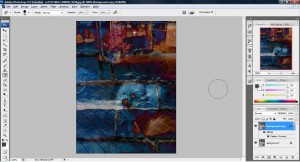
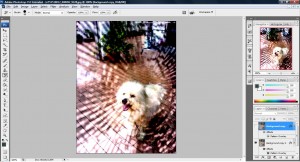
Tutorial: How to add effects with brushes!

Being a novice in photoshop i would say this is the greatest finding i have since i started playing with photoshop! I never know that there is such a powerful tool that most designer have been using to enchance their image and design! I would like to share this awesome technique to you guys and hope you guys find this interesting too~

This technique has something to do with the 'Brush Tool'. We can actually add some of the ready made brushes to enhance the effects of our design. ( of course, some brushes are not for commercial) It's REALLY simple to create a design with all these ready made brushes! Let me give you a demonstration.

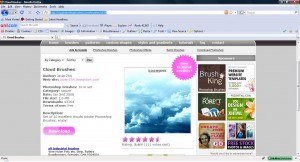
1. Visit this site and download the brushes you see.(There are a lot of them. Check them out!)

untitled121

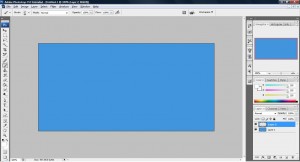
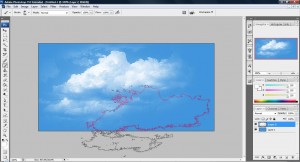
2. If you have no idea how to install the brushes, click here or visit the link shown on the above image. Once you have installed the brushes, fire up your photoshop and create a background in blue.

untitled122

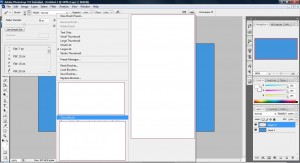
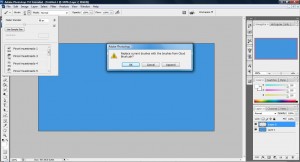
3.  Select your new brush (Usually its the same name as the file you place in your brush folder) and It will prompt you to overwrite the existing brush. Click HELL YEAH!

untitled123

untitled124

4. Once you have updated your brush, select one of it from the list and click on the workspace. Please bear in mind that your color must be different from the background color used.

untitled125

AWESOME! XD

This can also be applied on pattern when you want to make a great design for your background or button. But you will need to install it on the pattern folder and not the brushes folder. This technique also can be applied on different button and text which enchance the effects of your overall design.

Some basic on Javascript that not all programmers are aware

These are some of the JavaScript way of writing that one usually do not know by learning on some basic web site such as w3schoo.com

Declaring many variables at once

You can declare many variable at once by doing the following,

var test,test1,test2,test3,test4
OR
var test=1,test1=2,test2=3,test3=4,test4=5

Assignment operator shortcuts

you can do a assignment operator in short instead of writing long code.

x+3=x -> 1+=3
x-4=-x -> x-=4
x*1=x -> x*= 1
x/1=x -> x/=1
x+1=x -> x++
x-1=x -> x--

The "with" statement

The 'with' statement basically help you reduce some code. The meaning of with can be read as 'with this'. For example,

<script type="text/javascript">
document.write('Hi there, how are you?")
document.write('Fine, thanks. And you?')
document.write('Great!')
</script>

You can write as

<script type="text/javascript">
with(document)
{
write('Hi there, how are you?")
write('Fine, thanks. And you?')
write('Great!')
}
</script>

By using the 'with' statement, everything that falls inside of its brackets ({ }) default to the object specified in it's parameter. That way, you only need to type the object name once.

Remember, the "with" statement can be used with any JavaScript object to avoid having to repeatedly write the object out when referencing it multiple times.

The "?" conditional expression statement

This is a shortcut for if-else statement and it will return a Boolean value. For example, instead of writing this

if(x==1)
do something..
else
don't do it..

We can write something shorter such as this,

x==1 ? do something.. : don't do it..

The format for this is as follow,

(condition) ? doiftrue : doiffalse

Conclusion

The reason for doing all these shortcut is to improve efficiency of the code to help improve performances. Especially on large application where efficiency holds a key to whether its a good or bad application. Every line of code contribute greatly on the performance of the application. One will have to remember that speed in web application holds a key on whether anyone will visit or use your application/site.

Tutorial: How does image fade in when picture loaded in JavaScript

There is a very nice method mention in here by Richard Rutter. But i will explain it with my own words on how this is being done since i am curious on how some of these things work. i basically look it up and explain them so that i could understand them in the future if needed.

<html>
<head>

<style>
#photoholder {
  width:450px;
  height:338px;
  background:#fff url('loading.gif') 50% 50% no-repeat;
}
#thephoto {
  width:450px;
  height:338px;
}
</style>
<script>

document.write("<style type='text/css'> #thephoto {visibility:hidden;} </style>");
window.onload = function() {initImage()}
function initImage() {
  imageId = 'thephoto';
  image = document.getElementById(imageId);
  setOpacity(image, 0);
  image.style.visibility = 'visible';
  fadeIn(imageId,0);
}
function setOpacity(obj, opacity) {
  opacity = (opacity == 100)?99.999:opacity;

  // IE/Win
  obj.style.filter = "alpha(opacity:"+opacity+")";

  // Safari<1.2, Konqueror
  obj.style.KHTMLOpacity = opacity/100;

  // Older Mozilla and Firefox
  obj.style.MozOpacity = opacity/100;

  // Safari 1.2, newer Firefox and Mozilla, CSS3
  obj.style.opacity = opacity/100;
}
function fadeIn(objId,opacity) {
  if (document.getElementById) {
    obj = document.getElementById(objId);
    if (opacity <= 100) {
      setOpacity(obj, opacity);
      opacity += 10;
      window.setTimeout("fadeIn('"+objId+"',"+opacity+")", 100);
    }
  }
}

</script>
</head>

<body>
<div id='photoholder'>
<img src='cute-puppy.jpg' alt='Photo' id='thephoto' />
</div>
</body>
</html>

the code above is the whole HTML file that is needed for this explanation. I did not change anything written by Richard Rutter and merely just compile it up for my explanation.

So what is going on with the above code is that Richard has written a very unique function for each activity occurs in this example. There are basically 3 method, initImage(), setOpacity, fadeIn. The css in here doesn't really play any important round other than displaying the image up. The initImage method set the oject opacity and activate fadeIn method that did a recursive to slowly fade the image. The technique to Richard way of doing is to load the 'loading' image out to the guys and only started fading the image once it has been loaded  by using the onload function to determine whether the page has completely loaded. Once it is determine, it will active the fade in method to do the trick.

The main interest i have is how fade in effect works and with the code written by Richard, it is clearly understandable how this is happening.

You can look at the example HERE.

Tutorial: How to add on special effect for your photography photo

Learn something new in photoshop today and would like to share with people who know my existence XD. This tutorial gives an idea on how some images bring fantastic effects on their photograph. I will demonstrate an example below,

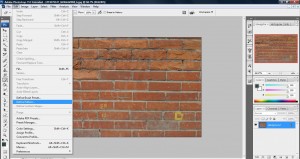
1. Fire up your photoshop and open any scene images you have and click Edit->Define Pattern, give it a name.

untitled116

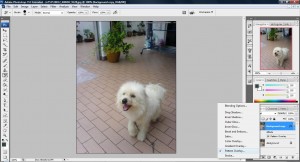
2. Now we have a new pattern we will open up another photo we want to give this effect to and on the Layer Palette look for the icon 'Add a layer style' and choose Pattern Overlay.

untitled117

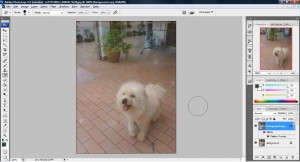
3. Now, choose the new pattern that you have define and play with the opacity and scale bar until it gets you something like this.

untitled118

Of course you can get a lot more effect than the one shown above, play around with the mode and you might just get what you want.

untitled119

The key point here is to use different texture found in our real world and apply it on the image itself to produce different effects. (google is your friend) Here are some example,

untitled120

In order to fully bring out this effect, we need to have a pattern which has a similar size as the image or else it won't be as good as expected. I am just showing how this effects can bring it to certain images but this kind of technique can also apply to different type of design such as buttons, background image,photography, etc.

Tutorial: How to produce the grey out effect using javascript and css

When i surf the net and saw all these fantastic feature where the screen went black-out when a user click certain link or button always makes me wonder how does it actually work? But i always do not have the time and knowledge to understand these things since my css knowledge has always been at the basic stage where understanding of it is just too little for me due to the working time that always occupate me. Recently, i have quit my job and went back to school which leaves me with a lot of space time. This has given me the chance to pump up my knowledge on css which i'm always weak in since the starting of my web programming. i would like to show my appreciation to the author of Hunlock who produce a great tutorial on this topic.

if you have a chance to visit Hunlock tutorial, you will see the above code that he wrote for this method to work. The technique to make the screen black-out is entirely depending on the CSS. What the above code does is to create a div tag just after the body tag which already have all the css rule appended into this particular div tag. But it is being hidden until a trigger occurs and turn the flag to true to display it out.

Originally, the background color of this particular div tag should be black entirely. However, with the introduction of alpha and opacity, it gives the background a feel of transparency. While the div is treated as a block level when its triggered and position at the top left hand side with the height and width being defined in the javascript, the whole screen will be occupant by the effect. The z-index will lift the div tag by z-axis (upwards) and anything below it will be covered by the black-out effect and whenever user tries to click anything below it, it will be disabled due to z-index and display:block.

function grayOut(vis, options, extra) {
  // Pass true to gray out screen, false to ungray
  // options are optional.  This is a JSON object with the following (optional) properties
  // opacity:0-100         // Lower number = less grayout higher = more of a blackout 
  // zindex: #             // HTML elements with a higher zindex appear on top of the gray out
  // bgcolor: (#xxxxxx)    // Standard RGB Hex color code
  // grayOut(true, {'zindex':'50', 'bgcolor':'#0000FF', 'opacity':'70'});
  // Because options is JSON opacity/zindex/bgcolor are all optional and can appear
  // in any order.  Pass only the properties you need to set.
  var options = options || {}; 
  var zindex = options.zindex || 50;
  var opacity = options.opacity || 70;
  var opaque = (opacity / 100);
  var bgcolor = options.bgcolor || '#000000';
  var dark=document.getElementById('darkenScreenObject');
  if (!dark) {
    // The dark layer doesn't exist, it's never been created.  So we'll
    // create it here and apply some basic styles.
    // If you are getting errors in IE see: http://support.microsoft.com/default.aspx/kb/927917
    var tbody = document.getElementsByTagName("body")[0];
    var tnode = document.createElement('div');           // Create the layer.
        tnode.style.position='absolute';                 // Position absolutely
        tnode.style.top='0px';                           // In the top
        tnode.style.left='0px';                          // Left corner of the page		
        tnode.style.overflow='hidden';                   // Try to avoid making scroll bars            
        tnode.style.display='none';                      // Start out Hidden
        tnode.id='darkenScreenObject';                   // Name it so we can find it later
		
	var msgnode = document.createElement('div');           // Create the box layer.
		msgnode.style.position='fixed';                 // Position fixed
        msgnode.style.display='none';                      // Start out Hidden
        msgnode.id='box';                   				// Name it so we can find it later
		// give it a size and align it to center
		msgnode.style.width = "300px";
		msgnode.style.height = "300px";
		msgnode.style.marginLeft= "-150px";      
		msgnode.style.marginTop= "-150px"; 
		msgnode.style.textAlign = 'center';
		msgnode.style.top= "50%";                           // In the top	
		msgnode.style.left="50%";                          // Left corner of the page	
	tbody.appendChild(msgnode);                            // Add it to the grey screen
    tbody.appendChild(tnode);                            // Add it to the web page
    dark=document.getElementById('darkenScreenObject');  // Get the object.
  }
  if (vis) {
    // Calculate the page width and height 
    if( document.body && ( document.body.scrollWidth || document.body.scrollHeight ) ) {
        var pageWidth = document.body.scrollWidth+'px';
        var pageHeight = document.body.scrollHeight+'px';
    } else if( document.body.offsetWidth ) {
      var pageWidth = document.body.offsetWidth+'px';
      var pageHeight = document.body.offsetHeight+'px';
    } else {
       var pageWidth='100%';
       var pageHeight='100%';
    }   
    //set the shader to cover the entire page and make it visible.
    dark.style.opacity=opaque;                      
    dark.style.MozOpacity=opaque;                   
    dark.style.filter='alpha(opacity='+opacity+')'; 
    dark.style.zIndex=zindex;        
    dark.style.backgroundColor=bgcolor;  
    dark.style.width= pageWidth;
    dark.style.height= pageHeight;
    dark.style.display='block';  
	if(extra == 'Y')
		document.body.style.overflow =  'hidden';
		
	document.getElementById("box").style.zIndex = zindex+10;
	document.getElementById("box").style.border = "#000 solid 1px";
	document.getElementById("box").style.display = "block";
		

	document.getElementById("box").onclick = function() //attach a event handler to hide both div
	{
		dark.style.display="none";
		document.getElementById("box").style.display = "none";
		document.body.style.overflow = 'auto';
		
	}
	document.getElementById("box").style.backgroundColor="#FFF";  
	document.getElementById("box").innerHTML = "This is a box. Click me to exit effect.";
  } else {
     dark.style.display='none';
  }
}

However, user will still be able to use the scroll bar. This can be solve by adding this code

<span class="pun">document.body.style.overflow =  'hidden';
</span>

this will disable scrolling and cause the content to stay still. Depending on your need, the code produce by Hunlock can be alter accordingly.

test5 to test~

update: 27 June 2009****

I have changed the method above to include a box when the grey out appeared and a event handler attached with it so that it can be easily return back to its original form when clicked. Apologize if i did not make this update clean enough as i sort of made a quick update on it in order to answer Sanynn question below.

update: 12 July 2009*****

Update the method so that the box is align on the center, in order to align the box on the center when using position absolute, you must reset the four corner to 0 and margin to auto. Having problem aligning the box to center? Solve your problem easily with align center with CSS

update: 25 July 2009*****
If you are using jQuery, you may want to visit Simple Grey-Out Screen Effect with jQuery This article shows a complete grey out effect and how it can be done easily with just few lines of codes.

update: 24 September 2009*****
Updated the script so that the box will follow the scroll bar. The key is to position it 'fixed' and remember to placed up the DTD such as the one show below

<!DOCTYPE HTML PUBLIC "-//W3C//DTD XHTML 1.0 Transitional//EN" "http://www.w3.org/TR/xhtml1/DTD/xhtml1-transitional.dtd">

If not IE won't align center. That's all! 🙂