Tutorial: How to create a simple vibration effect for your form box with jQuery

This effect can be used to validate certain criteria in your form. Other than using highlighter to highlight the error area, we can use a more creativity approach by vibrating that particular input box to alert the user. This tutorial demonstrate a very easy way to understanding how vibration works on the web and how it can be used in your web design.

The Concept

In order to perform a vibration effect, we must first understand how will a person feel during an earthquake. The whole world will be shaking right? In a more defined term, it means that the object are moving on it own, not us. Similarly, we are staring at the monitor while the boxes are moving on its own! Next question, how do you move? The answer to my question will be the same answer on how the boxes move but not by legs. Rather, the position will be moved. In conclusion, we will try to move the position left and right, up and down to simulate vibration.

The Code

Coding part will be split into 2 part. The structural and jQuery part. The CSS part is fairly simply to understand since we are just aligning them to the center and that's it.

HTML

The following will be the only thing we need in here.

<div id="frame">
	<div id="container">
		<div class="box" id="box1">
		<p>Username<input type='text' size='20'></p>
		<p>Password<input type='text' size='20'></p>
		<p><input type='button' value='Submit' id='activate'/></p>
		</div>
	</div>
</div>

We will only use the 'frame' and 'activate' ID in this tutorial. You can safely ignore all other structure as it will not affect the vibration. The reason is we are shaking the most outer box which is 'frame' and an event handler is attached on 'activate'.

jQuery

The confusing part may be the jQuery code. But we will only need to know certain variable in order for this to work. The variables are,

  var interval = 30;
  var duration= 1000;
  var shake= 3;
  var vibrateIndex = 0;
  var selector = $('#frame');
  var stopVibration;
  var vibrate;

Let me explain the variable shown above in a well indented manner,

  • interval: this is used to set the duration for each movement. eg, every 30 millisecond it will move left,right,top or bottom once.
  • duration: this is used to set the duration for the whole effect. eg, it will vibrate for 1000 millisecond
  • selector: this is the jQuery selector we are going to apply the vibrate with
  • stopVibration: this is the method that will stop the vibration after 'duration' variable
  • vibrate: this is the method that will start the vibration
  • vibrateIndex: this is the index that setInterval provides when used to tell 'stopVibration' which vibration to stop

It should be easy to understand the variables needed for this effect to accomplished. Now for the 'stopVibration' and 'vibrate' method explanation:

	var vibrate = function(){
	$(selector).stop(true,false)
	.css({position: 'relative', 
	left: Math.round(Math.random() * shake) - ((shake + 1) / 2) +'px', 
	top: Math.round(Math.random() * shake) - ((shake + 1) / 2) +'px'});
	}

Let's start with 'vibrate'. The above code will take the selector and stop whatever animate it is performing and set the box position as relative so it will move starting from his original position. We set the left and top randomly with a mathematics calculation. So it will move itself left or top randomly. (change the equation to make it vibrate differently)

	var stopVibration = function() {
	clearInterval(vibrateIndex);
	$(selector).stop(true,false)
		.css({position: 'static', left: '0px', top: '0px'});
	};

'stopVibration' will stop the interval with the index given and return the box to its original position. That's it!

Lastly, we will need to add an event handler to the button for it to vibrate!

	$('#activate').click(
	function(){	
	vibrateIndex = setInterval(vibrate, interval);
	setTimeout(stopVibration, duration);
	});

The button click will be attached with an event handler click that will use setInterval to vibrate the outer container in every 'interval' given (move left right top down randomly in every 'interval'). This will caused it to vibrate forever. Thus, we will have to use 'setTimeout' function to stop the vibration by placing the method 'stopVibration' and the 'duration' it wants to vibrate. And it is as simple as that. The final code will be:

$(function() {
  var interval = 30;
  var duration= 1000;
  var shake= 3;
  var vibrateIndex = 0;
  var selector = $('#frame');
	$('#activate').click(
	function(){	
	vibrateIndex = setInterval(vibrate, interval);
	setTimeout(stopVibration, duration);
	});

	var vibrate = function(){
	$(selector).stop(true,false)
	.css({position: 'relative', 
	left: Math.round(Math.random() * shake) - ((shake + 1) / 2) +'px', 
	top: Math.round(Math.random() * shake) - ((shake + 1) / 2) +'px'});
	}
	
	var stopVibration = function() {
	clearInterval(vibrateIndex);
	$(selector).stop(true,false)
		.css({position: 'static', left: '0px', top: '0px'});
	};

});

That is all you need to make your own vibrate effect.

The Demo

You can get and view the demo files from the following link:

10 useful tips and tricks when using Adobe Illustrator

Adobe Illustrator has a number of tools that Photoshop does not have, and is generally used to create icons as it can be edited infinitely and can be shrunk or increased in size without losing any picture quality. Below are some other great tips for using Illustrator and the wonderful effects that can be created.

How to create sketch style icons in Illustrator

sketch style icons

This sketchy scribbled-in style is used by a lot of websites, and here's how to do it like you coloured it in with your pencil! Also, they were kind enough to have the AI source file  for download so you don't even have to do it yourself, just download the file and snatch their icon. Remember to leave some feedback though, I'm sure they'll appreciate it! I'll be using this technique in my site too!

How to do a colourful lighting effect

colourful lighting effect with illustrator

So you think only Photoshop can produce amazing lighting effects? Illustrator can too! And this site demonstrates it pretty well. I think Illustrator is pretty underestimated in a lot of things that it can do, and there aren't enough tutorials out there to show what its capabilities are. It doesn't just draw.

How to create an alarm clock icon

how-to-create-an-alarm-clock-icon-vectortuts_1240577432343

This alarm clock looks pretty realistic and is illustrated largely with the help of the gradient tool. This site also has a pretty nifty and detailed tutorial to illustrate an open book using the 3d extrude and bevel tool.

How to create an open book with the extrude and bevel tool

open book with 3d extrude and bevel tool

How to create an abstract background

abstract-background

This would be pretty easy if you got the hang of Illustrator and is well-acquainted with the Blend tool. But if you haven't, this tutorial will teach you how! The blend tool is very underused in Illustrator but it's one of the most useful ones out there.

How to design your own funky digital character

funky character

Scan your sketches, upload them into Illustrator, and use the live trace to trace the paths of your character. You can then create your own personal funky cartoon character!

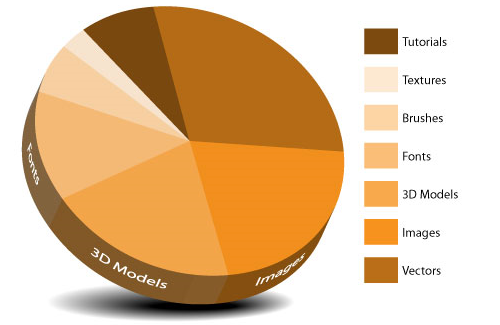
How to create a 3d pie chart

vector-tutorial-creating-a-killer-3d-pie-chart-in-illustrator-graphic-design-free-resources_1240580404136

Need to create an awesome pie chart to impress your colleagues at your presentation? Here's how!

How to create a realistic candy bar

candy bar

This article is a step by step tutorial on creating a realistic candy bar simply with the options contained in the Effects menu. It's amazing how simple the effect on the candy bar is just by adding a few touches of shadow and lighting on an otherwise flat image.

How to create a furry vector monster

cute furry vector monster

The one striking thing about this monster, is the fur detail all over the body. Without it, it wouldn't look half as great. The tutorial has a detailed step-by-step instruction on how to create the monster as well as how to create the fur detail to create a little more depth to your cartoon character.

Creating a swatch gradient background effect

Illustrator swatches gradient background effect - Veerle's blog_1247160232967

This pixellated gradient effect is a cool effect to use, and surprisingly really really easy to do with the blend tool (again, the blend tool is really really useful and one of the most powerful tools in Illustrator).

Tutorial: jQuery wrap doesn’t work in IE

This is something happen to me a while ago when i am testing my WordPress plugin over different browser (testing cross browser issue). Every browser work well (Firefox, Opera, Chrome, Safari) but IE went wrong. Not surprising IE is the king for being different and causing most problem to developers (well known fellow). Oddly, IE is pointing its finger on one of the line related to jQuery wrap manipulation operation. Weird.

Problem

After debugging a while, i manage to find the problem that is happening with IE and not with other browsers. I used wrap operation to insert a form into a div container (to perform a asynchronous upload over different browser and try not to knock on WordPress style sheet etc.). So the form should wrap over the div container as stated in jQuery documentation. However, in IE it couldn't seems to find this particular new form that was inserted through the wrap operation (scratch head). Since this is a JavaScript DHTML operation, obviously it won't show during view source (at least not for IE). Through the error line instructed by IE browser it indicated that the particular form ID could not be found (form doesn't exist). jQuery warp doesn't support IE 7? Nah..

Solution

So what is going on? Many jQuery users will like to write a wrap operation in this way (including me)


$('#example').wrap('<form id="form2" name="form" action="#" method="POST" enctype="multipart/form-data" >');

This is perfectly alright to wrap a form over some div block. Nothing seems to be wrong as it can be declare this way. Well, most of us will do that since it doesn't add additional word to lengthen the instruction which always make it a bit difficult to read (due to jQuery chaining). However, if you declare it this way using the wrap operation, IE will not work! The wrap operation basically fail without showing any error indicating that the new form which was instructed to create was not there. Good news is that it is not really jQuery fault that it doesn't work when declaring a wrap operation this way. In order for jQuery v1.3 to work in IE using the wrap operation, the declaration must be in this form


$('#example').wrap('<form id="form2" name="form" action="#" method="POST" enctype="multipart/form-data" ></form>');

seems no differences between the two code. But the key is the closing tag which is that ONLY requirement for IE to work flawlessly. Without the closing tag it will not work.

Demo

let me show you a demo to illustrate the differences between the two declaration using the following JavaScript.


$(function(){
	$('#wrong').wrap('<form id="form1" name="form" action="#" method="POST" enctype="multipart/form-data" >');
	$('#correct').wrap('<form id="form2" name="form" action="#" method="POST" enctype="multipart/form-data" ></form>');
});

function withoutCloseTag()
{
	if(document.getElementById('form1') != null && document.getElementById('form1') != "undefined")
	{
		alert("We found wrap for button 'IE with problem'");
	}
}

function withCloseTag()
{
	if(document.getElementById('form2') != null && document.getElementById('form2') != "undefined")
	{
		alert("We found wrap for button 'IE without problem'");
	}
}

The script will alert if the usage of wrap is successful and when fail it will not show any alert message. Try this in IE with other browser. You will find that the second declaration work flawlessly over all browser while the first declaration will only work on all browser except IE (IE no pop out).

Conclusion

Unlike some jQuery tutorial online that teaches the basic of jQuery that indicates the first method of declaration work (without closing tag). It is necessary for jQuery developers to know the differencces between declaring a DHTML operation using jQuery that a closing tag will make a differences when your application is serving different browser.

$(function(){
$('#wrong').wrap('
');
$('#correct').wrap('
');
});
function withoutCloseTag()
{
if(document.getElementById('form1') != null && document.getElementById('form1') != "undefined")
{
alert("We found wrap for button 'IE with problem'");
}
}
function withCloseTag()
{
if(document.getElementById('form2') != null && document.getElementById('form2') != "undefined")
{
alert("We found wrap for button 'IE without problem'");
}
}

Tutorial: How to get post id when using publish_post action hook in WordPress

This topic may seems stupid to some plugin developers but it may really surprise you. Most of you will just say, "Hey, just use the WordPress global variable, $post. Issue solved!". Yes, it is stated as global variable across WordPress developers and it should be globally available. Surprisingly, IT IS NOT~. I spend hours researching for an answer which are not document anywhere and finally decided to write a post to inform some plugin developer who are still unaware of such condition.

Problem

I wanted to attached a function to an event, publish_post whenever the user click on publish or update button when they have done with their post in WordPress. Usually, global variable $post will solve this problem easily. But for the case of publish_post action hook, this is not the case. The global variable $post which is accessible in any area of WordPress is not accessible when a user clicked on the publish button. The global variable $post will return 'null' instead of the post object which contain all the post data. Let the nightmare began.

Solution

Usually, we will see this on top of the post,

url-wordpress

The URL of the post page contains the post ID! So the smart alex me try to be funny and use a $_GET['post'] to try retrieve the post id after i have failed miserably on the global variable, $post upon user clicked on publish button. With hope, it fail again. So i was thinking, maybe there exist some post data instead of a get data. So i try to use $_POST['post'] to retrieve the post id. Fail (expected). Since i am using a function to tried all these methods (post,get, global variable) as shown below,

function example()
{
global $wpdb;
global $post;
echo var_dump($post)."<br />";
echo $_POST['post']."<br />";
echo $_GET['post']."<br />";
}
add_action('publish_post', 'example');

There might be a problem retrieving global variable in my function so i try doing it outside the method as shown below,

global $post;
echo var_dump($post)."<br />";
echo $_POST['post']."<br />";
echo $_GET['post']."<br />";

function example()
{
global $wpdb;
global $post;
echo var_dump($post)."<br />";
echo $_POST['post']."<br />";
echo $_GET['post']."<br />";
}
add_action('publish_post', 'example');

It still fail! Nightmare. If you look at WordPress Plugin API, on the publish_post description it state this,

Runs when a post is published, or if it is edited and its status is "published". Action function arguments: post ID.

Action function arguments: post ID? Looks like using this action hook required a function argument post ID. So i tried this instead.

function example($post_ID)
{
global $post;
echo $post_ID."<br />";
echo var_dump($post)."<br />";
echo $_POST['post']."<br />";
echo $_GET['post']."<br />";
}
add_action('publish_post', 'example');

Surprisingly, i got it! The ID is retrieved this way! No global variable available if you are using publish_post action hook!

Conclusion

I believe the reason why the global variable,$post  is not available during publish_post action hook was because the details of the post has been updated by the user and the information in the global variable are not updated. Thus, only the ID is available in the global variable if there is one. So to avoid unnecessary usage of memory, the global variable, $post was not created instead. The WordPress version for this was 2.8. Hope this help out a bit.

Tutorial: How to add action to excerpt in WordPress

In case some of you don't know what the title of this post means, it has to do with building plugin for WordPress. Let me explain  a little on what does an action means in WordPress. Basically, we can add a function to an action or event (whatever you called it) in WordPress to perform some task before or after the action or event has occured.

Problem

The reason why i bought this post up was because i nearly get frustrated working on my WordPress plugin because there wasn't any action listed in WordPress plugin API that stated an action that can be attached to an event before or after an excerpt is being bought out! Search all over the place, fail. So i decided to do a trial and guess with these action thing for my plugin to attached an event when an excerpt is being bought out.

Solution

In case you might not aware how a excerpt is being printed out on the template, they used


the_excerpt();

This will print out the excerpt in your WordPress. So i tried using the_excerpt to be placed into my WordPress add_action statement as shown below,


add_action('the_excerpt', 'hpt_attach_excerpt');

'hpt_attach_excerpt' is the function call when excerpt is being triggered. To my surprise, it work! But it will only display whatever the function, 'hpt_attach_excerpt' contains as shown below. no_exerpt_attached

So where is my regular excerpt? It seems like if i attached a defined action used in WordPress that are not listed in the WordPress Plugin API, it will be overwritten by my own method 'hpt_attach_excerpt'. I digged again to find the method in WordPress site that will provide me with the missing excerpt i was looking for. Fail. So i digged into the source code of WordPress and managed to find the key method that return the excerpt of a post, get_the_excerpt(). get_the_excerpt() is the based method that retrieve the data from the database to the_excerpt for it to filter.  Now i write the code as follow,


function hpt_attach_excerpt()
{
echo "This is the function 'hpt_attach_excerpt' produce";
echo get_the_excerpt();
}
add_action('the_excerpt', 'hpt_attach_excerpt');

Looking back to the display to check whether the attachment has completed.

found-excerpt-attached

There it is! Both my function message and my excerpt message!

P.S: You can use add_filter if you do not wish to overwrite the default function of 'the_excerpt' function.

Conclusion

If you have read through the post, you might aware that this is not only restricted to adding action for excerpt. This shows that we can add any WordPress function that are not defined in WordPress Plugin API (Offical action available) as action and rewrite or append any type of instruction to the default action given by WordPress. Can't find your action needed to perform your WordPress plugin? You just found the answer! Hope this can help many developers who are working on their plugin! ( Thanks for all the wonderful plugin developed! )