This is a tutorial on how to draw a simple flower petal using Adobe Illustrator. I use Adobe Illustrator CS4, but most of the tools are the same in the earlier versions.
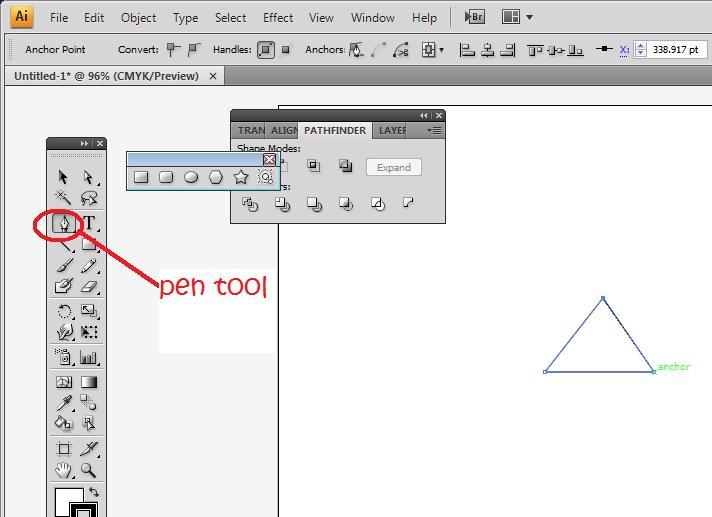
With the pen tool, draw a triangle. Join all the dots.
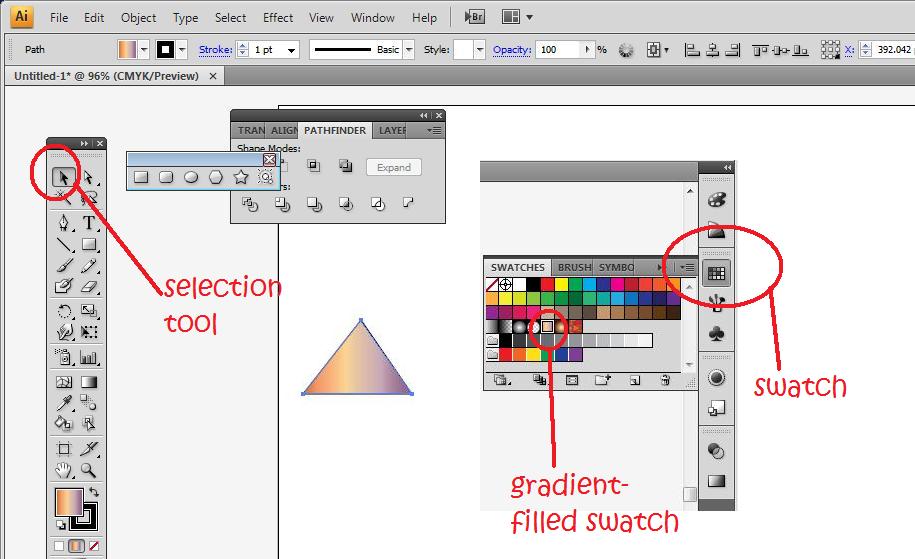
Then select the path with the selection tool (V) and clicking on swatch, select a gradient filled swatch to fill in the triangle. Illustrator is annoying in a way that it doesn't allow you to fill in a coloured gradient just by clicking on gradient.
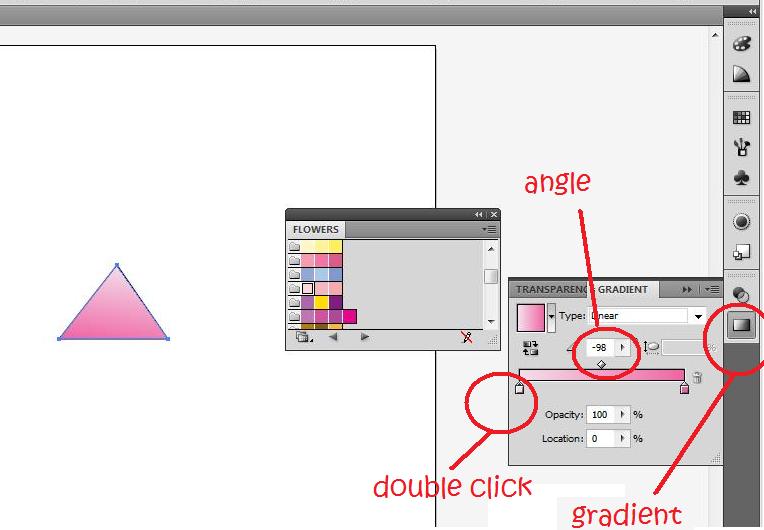
Next, click on gradients (Window>Gradients). Select the linear gradient. I chose a light pink (double click on the square on the gradient bar to choose the colour) followed by a darker pink on the gradient bar. I then changed the angle of the gradient to -98 to that the light pink is at the tip of the triangle.
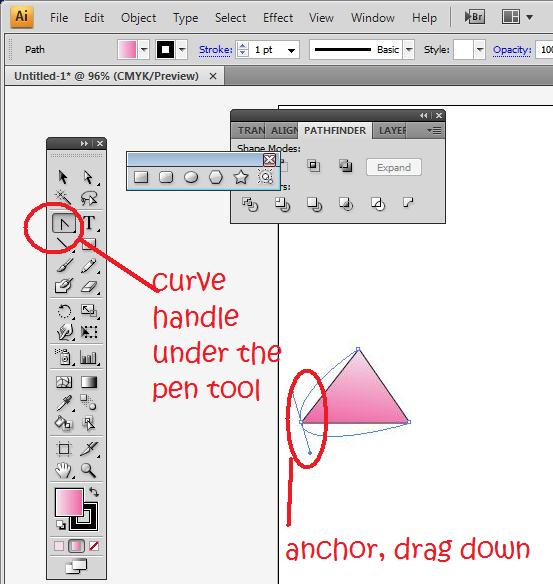
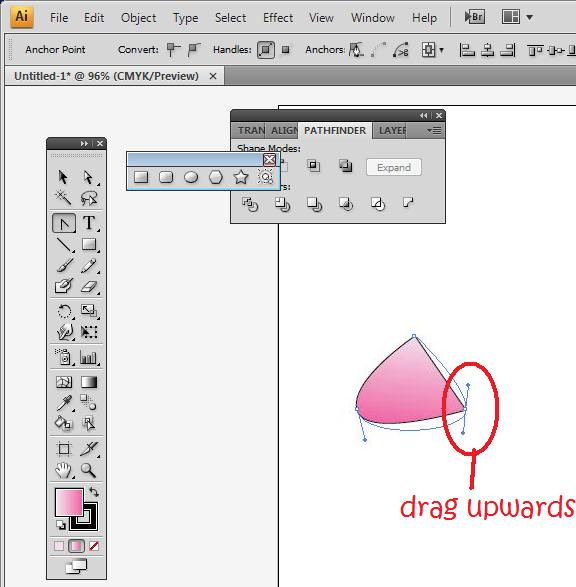
Next by clicking on the curve handle tool, which is hidden under the pen tool (hold the click of the pen tool and choose the curve handle). I click on the anchor on the bottom left of the triangle and drag downwards. This would result in a curved path.
I then click on the right anchor and drag it upwards instead of downwards. You should adjust so that the petal shape that you want is achieved.
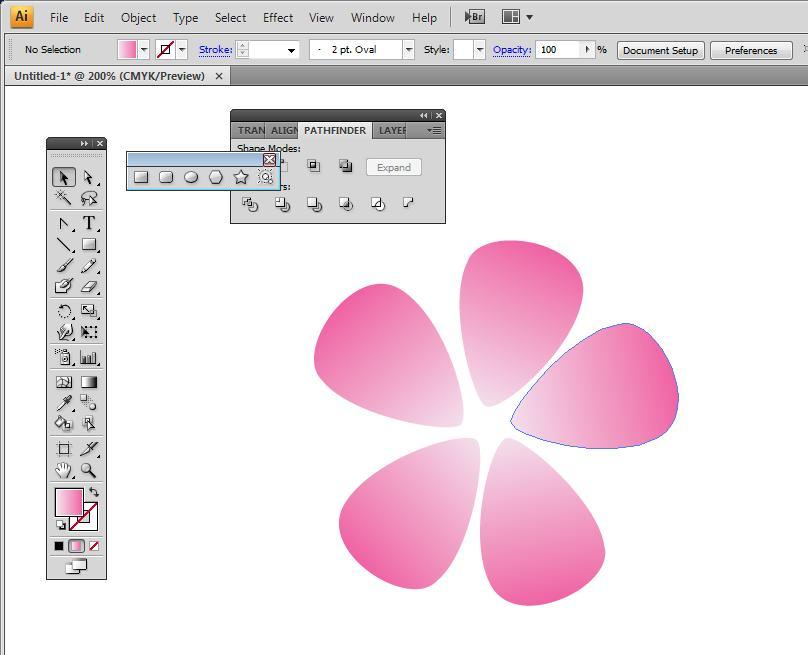
If the tip of the petal is too sharp, use the curve handle to change the shape. In the end, you get a petal that looks like this!
You can do countless things with this. I duplicated it five times and rearranged it to look like a flower, or you can even duplicate it and rotate it around to achieve the image of falling petals.



2 thoughts on “Tutorial: How to draw a flower petal using Adobe Illustrator”
Comments are closed.