PID:4 using Port 80 In Windows Server 2012 R2

i will cut the chase, if you are suspecting something is using Port 80 and is trying to find out what is it, here are some suggestion. Try stopping the following services

  • IIS
  • World Wide Web Publishing service
  • IIS Admin Service
  • SQL Server Reporting services
  • Web Deployment Agent Service

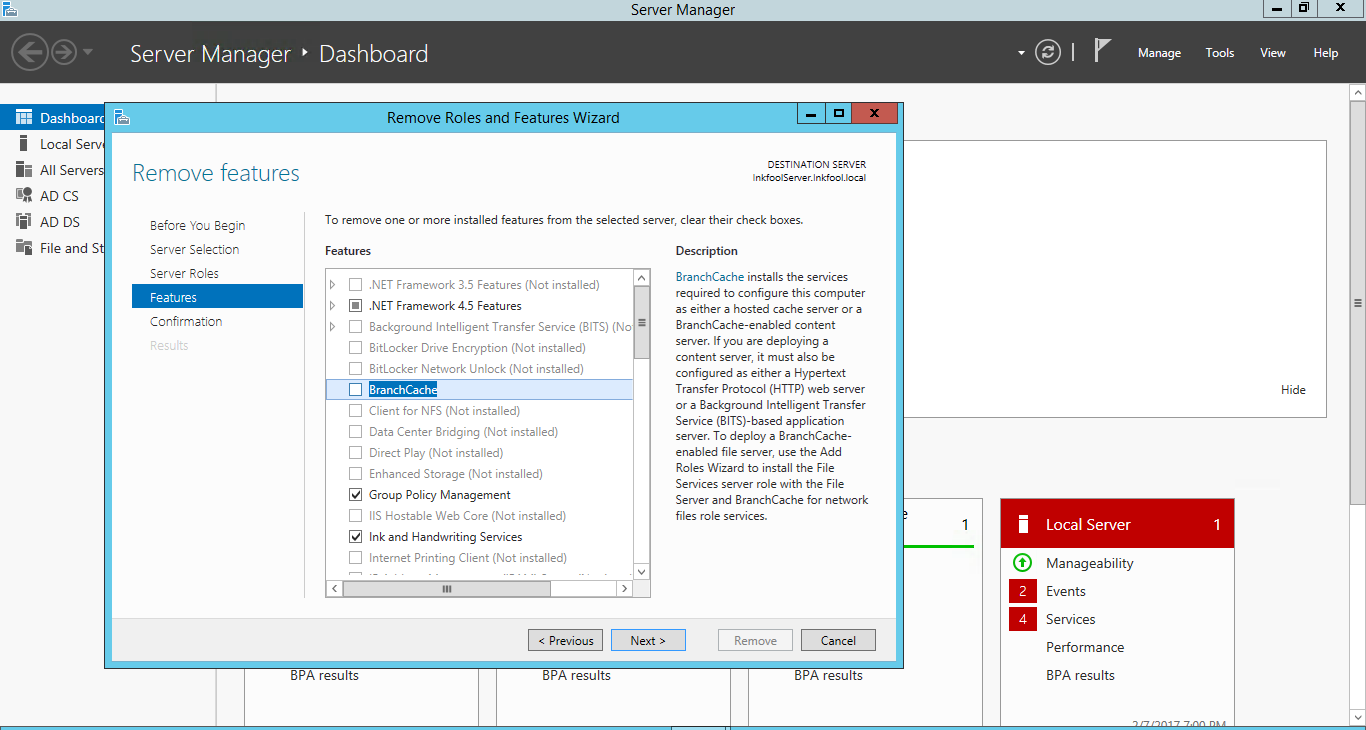
And if the  NT Kernel was still listening on port 80, you just hit the jackpot with me. Its BranchCode. Try removing it under "Remove Roles" in "Server Management" as show below,

Once you remove that, restart your server and port 80 should be all yours. Verify using the following command,


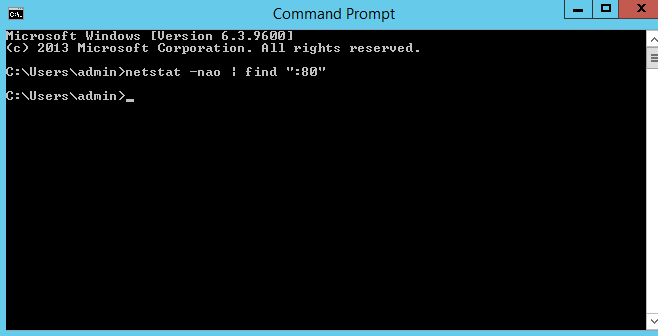
netstat -nao | find ":80"

and it should show you this.

Good LUCK!

Backlog limit exceeded error and freeze in CentOS 6

"Backlog limit exceeded error", basically what happen is that your OS audit folder is getting flooded with audit events and is unable to write to /var/log/audit directory as the write are too damn fast. It cause the whole system to freeze and you won't be able to login either. Here are a few solutions,

Disable Audit Log

The easiest way is to disable audit log altogether. This will prevent the problem altogether but leaving you with empty audit log to figure out what is going on in your system

/etc/init.d/auditd stop
chkconfig auditd off

Usually we want the log hence this might not work for everyone.

Increase the buffer size

By increasing the buffer size, we can prevent the system from crashing

 auditctl -b 8192

of you can head over to /etc/audit/audit.rules and change the value permanently

# This file contains the auditctl rules that are loaded
# whenever the audit daemon is started via the initscripts.
# The rules are simply the parameters that would be passed
# to auditctl.

# First rule - delete all
-D

# Increase the buffers to survive stress events.
# Make this bigger for busy systems
-b 8192

# Feel free to add below this line. See auditctl man page

or change the priority at /etc/audit/auditd.conf

#
# This file controls the configuration of the audit daemon
#

log_file = /var/log/audit/audit.log
log_format = RAW
log_group = root
priority_boost = 6

But then, there are times when it grows so big, you want to look into the source of the problem. Hence, might not work for everyone too.

Debugging it

Now, the last solution i have is to look for the issue.

aureport --start today --event --summary -i

which will show us what happen today that crashed my server

-bash-4.1# aureport --start today --event --summary -i

Event Summary Report
======================
total  type
======================
9474  AVC
1196  USER_ACCT
1196  CRED_ACQ
1195  USER_START
1194  LOGIN
1194  CRED_DISP
1194  USER_END
83  NETFILTER_CFG
5  CRYPTO_KEY_USER
3  USER_AUTH
2  CRYPTO_SESSION
1  USER_LOGIN
1  DAEMON_START
1  CONFIG_CHANGE

Now notice this AVC. It has a total of 9474! Gosh, what the heck is that.

-bash-4.1# aureport --start today

Summary Report
======================
Range of time in logs: 11/07/2016 00:00:01.323 - 11/07/2016 10:49:26.950
Selected time for report: 11/07/2016 00:00:00 - 11/07/2016 10:49:26.950
Number of changes in configuration: 86
Number of changes to accounts, groups, or roles: 0
Number of logins: 1
Number of failed logins: 0
Number of authentications: 3
Number of failed authentications: 0
Number of users: 5
Number of terminals: 7
Number of host names: 2
Number of executables: 27
Number of commands: 26
Number of files: 1705
Number of AVC's: 9746
Number of MAC events: 0
Number of failed syscalls: 1263
Number of anomaly events: 0
Number of responses to anomaly events: 0
Number of crypto events: 7
Number of integrity events: 0
Number of virt events: 0
Number of keys: 0
Number of process IDs: 4475
Number of events: 17107

Google a bit gives me this

For SELinux there are two main types of audit event:

AVC Audit Events - These are generated by the AVC subsystem as a result of access denials, or where specific events have requested an audit message (i.e. where an auditallow rule has been used in the policy).

SELinux-aware Application Events - These are generated by the SELinux kernel services and SELinux-aware applications for events such as system errors, initialisation, policy load, changing boolean states, setting of enforcing / permissive mode, relabeling etc.

Ah! My SELinux is enable! More Info on AVC (https://selinuxproject.org/page/NB_AL) Looking into /etc/selinux/config


# This file controls the state of SELinux on the system.
# SELINUX= can take one of these three values:
#     enforcing - SELinux security policy is enforced.
#     permissive - SELinux prints warnings instead of enforcing.
#     disabled - No SELinux policy is loaded.
SELINUX=permissive
# SELINUXTYPE= can take one of these two values:
#     targeted - Targeted processes are protected,
#     mls - Multi Level Security protection.
SELINUXTYPE=targeted

Now disabling it won't flood my audit log! Since i don't need SELINUX on my server.
How to move all cPanel accounts to new server via command line

This is a short how-to tutorial to migrate or transfer all cPanel accounts from my old 1.5TB server to another new SSD server through command line.

Backup all cPanel accounts

i am assuming, you know what you want, so we have to first backup all the cPanel accounts in our old system using the following command

ls /var/cpanel/users | while read a; do
/scripts/pkgacct $a
done

remember to screen first before doing the above, as this might take a while if there is a lot of accounts in your machine.

Transfer all cPanel accounts

now, we need to transfer all the cPanel accounts from our old server to the new ones. Notice the pkgacct script generate all the cpmove file on /home directory, use the command below,

bash-4.1# rsync -av --progress /home/*.tar.gz [email protected]:/home

where 192.168.0.2 is your new server. Now, all the files are transferring to our new server!

Restore all cPanel accounts

Finally, in our new server, fire the following command,

ls /home/ | awk -F'[-.]' '{print $2}' | while read a; do
/scripts/killacct --user=$a
/scripts/restorepkg $a
done

similarly, remmeber to screen first before doing the above.

Change new server ip address

You might want to change the ip address of your new server to the old ones. Do the following,

To change the server's main IP address, perform the following steps:
Open the /etc/sysconfig/network-scripts/ifcfg-eth0 file with a text editor.
Edit the IPADDR and GATEWAY lines to use the IP address and gateway of your old server.
Open the /etc/ips file with a text editor.
Add your old server's primary IP address, net mask, and gateway to the file.
Note:
Remove the new server’s primary IP address from this file if it is present.
Restart the network service with the following commands:
For CentOS, CloudLinux™, and Red Hat® Enterprise Linux (RHEL) 6 and earlier, and Amazon Linux, run the service network restart command.
Note:
Amazon Linux always runs in a NAT configuration. 
 
For CentOS, CloudLinux, and RHEL 7 and later, run the systemctl restart network command.
Run the /scripts/mainipcheck command to add the IP address to the /var/cpanel/mainip file.
Run the /scripts/fixetchosts command to add the IP address and hostname of your server to the /etc/hosts file.

and you should be good to go. Test it out and enjoy your new environment!

corosync died: Could not read cluster configuration Check cluster logs for details

Well, if you see this and you did nothing to your cluster other than freeing up some space, you may just find yourself seeing the error below,

Stopping cluster:
   Stopping dlm_controld... [  OK  ]
   Stopping fenced... [  OK  ]
   Stopping cman... [  OK  ]
   Unloading kernel modules... [  OK  ]
   Unmounting configfs... [  OK  ]
Starting cluster:
   Checking if cluster has been disabled at boot... [  OK  ]
   Checking Network Manager... [  OK  ]
   Global setup... [  OK  ]
   Loading kernel modules... [  OK  ]
   Mounting configfs... [  OK  ]
   Starting cman... corosync died: Could not read cluster configuration Check cluster logs for details

Google around and you get scary stuff like reinstalling the cluster and stuff like that. But what really works for me without jumping off the building was that the cluster logs in /var/log/cluster was deleted and causes the corosync to die. Hence, you might want to check your log is there before doing some fanciful work of redoing everything.

Repair Window Server 2012r2 in KVM – 0xc000000f

This is more like my issue which i give myself today. Hence, i better write out how to save my ass later on. Basically i have a Window Server 2012r2 in KVM and after i adjust the hard drive by expanding it, something bad happen and i get the following error

0xc000000f – The Boot Selection Failed Because A Required Device Is Inaccessible

Yeah, I can't restart my server. Hence, i downloaded Window Server 2012r2 iso and boot from it hoping that my server is able to repair and reboot again. I was wrong. It wasn't that easy. Lucky i manage to do it somehow, hence, here, i will be writing how i did it.

Repairing Window Server 2012r2 in KVM

The first thing you need to do is to attach the Window Server 2012r2 setup disc under the DVD drive,

Next head over to fedoraproject and download the virtio driver and also attach it to kvm.

Screen Shot 2016-06-04 at 3.02.05 AM

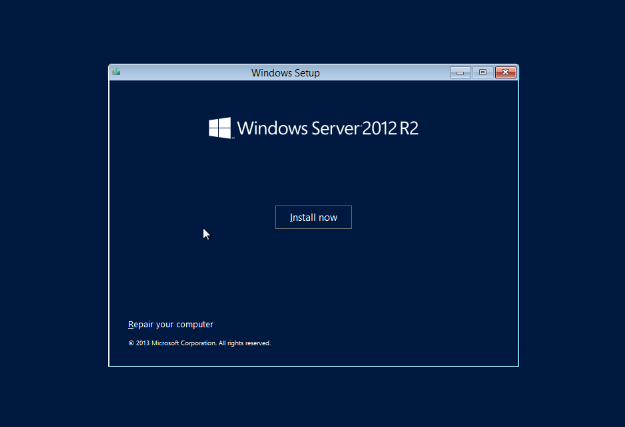
You should have something like the one shown above. Now boot from Windows Server 2012r2 as show below,

Screen Shot 2016-06-04 at 3.06.12 AM

Click on Repair Your Computer and you will see this

Screen Shot 2016-06-04 at 3.06.20 AM

Click on Troubleshoot and you will see this

Screen Shot 2016-06-04 at 3.06.26 AM

Click on System Recovery Image

Screen Shot 2016-06-04 at 3.06.52 AM

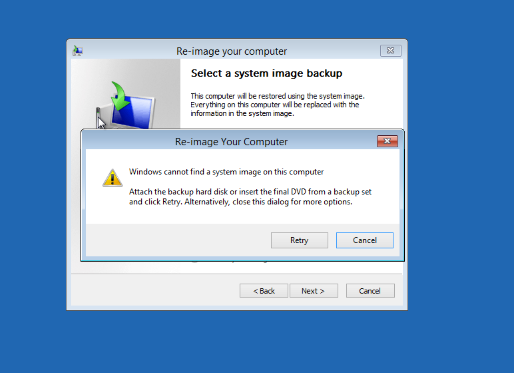
You will see a warning, ignore it and click Next

Screen Shot 2016-06-04 at 3.07.01 AM

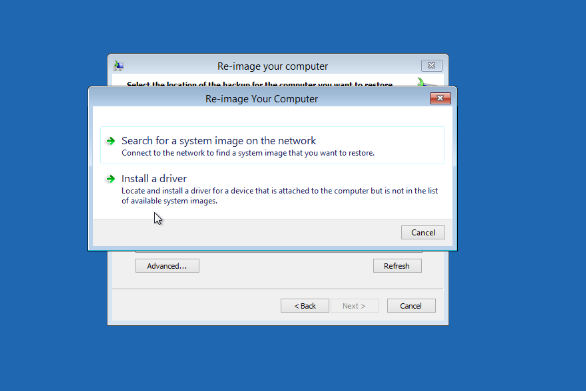
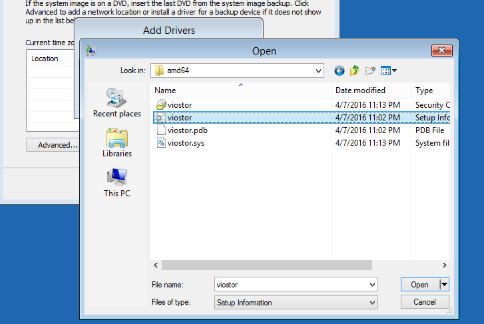
Click on Install a driver

Screen Shot 2016-06-04 at 3.07.22 AM

Now, select the drive that has virtio driver on it and find a folder call viostor and select the file u see above. Then exit this and go to command prompt,

then key in the following command

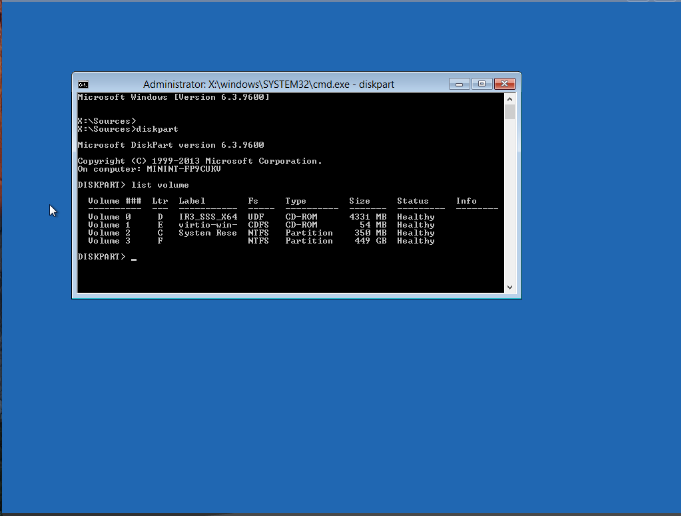
diskpart

and list out the volume and make sure you can see your hard disk here.

list volume

It will indicate the RAW volume, which is actually the NTFS partition and is responsible for the generation of boot error.

Screen Shot 2016-06-04 at 3.09.52 AM

Now our main target is to convert this RAW volume into NTFS partition. To do so, type the following command:

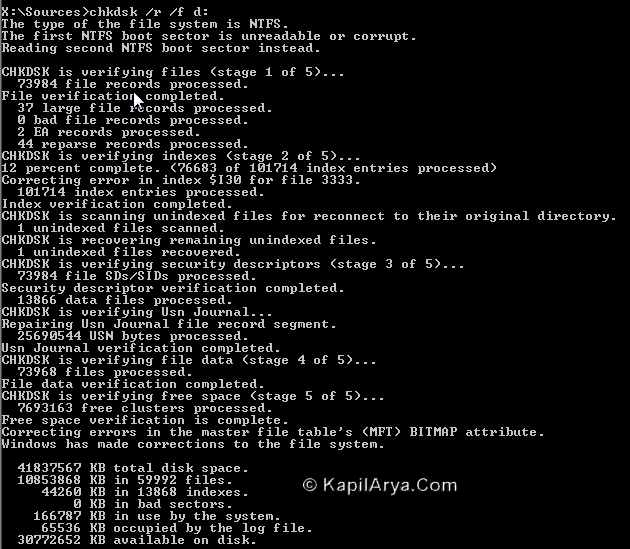
chkdsk /r /f f:

Once this command used, the main partition now generates the error “The first NTFS boot sector is unreadable or corrupt.” But the good thing is that it actually repairs the second partition.
The-boot-selection-failed-because-a-required-device-is-inaccessible-4

In this way RAW volume is converted into NTFS partition and the other errors involving indexes, master file table etc. are identified and repaired automatically. Reboot the machine and you should be able to access normally now. All fix!

Credit goes to the following,

  • http://www.kapilarya.com/how-to-fix-error-0xc000000f-the-boot-selection-failed-because-a-required-device-is-inaccessible
  • http://serverfault.com/questions/423103/how-can-i-run-startup-repair-on-a-kvm-virtualized-windows-server
  • https://neosmart.net/wiki/the-drive-where-windows-is-installed-is-locked/
  • http://beta.itprotoday.com/management-mobility/fix-unbootable-systems-bootsect?
  • http://www.hackaapl.com/repairing-windows-2012-r2-startup/
  • https://www.lifewire.com/how-to-rebuild-the-bcd-in-windows-2624508

and good luck guys!