List of Useful Proxmox Command

It's been some time since i wrote something in this blog. I've been pretty busy with product building till i lose track of time. Time sure pass quickly. Recently i've a chance to work on Proxmox again. It is still as powerful as ever and many more version came up and so are the problems. Hence, i figured to list down those command that i come across that might be useful one day. I'll bring it into a few sections for easy navigation in the future.

Proxmox Command

  1. Get a quick overview on how fast your system is: pveperf
  2. Verify the subscription status of your hardware node: pvesubscription get
  3. Start a backup of machine 101: vzdump 101 -compress lzo
  4. PVE Cluster Manager - see "man pvecm" for details.
  5. Restart every single Proxmox services: service pve-cluster restart && service pvedaemon restart && service pvestatd restart && service pveproxy restart
  6. Proxmox VE version info - Print version information for Proxmox VE packages. : pveversion
  7. Find next free VM ID: pvesh get /cluster/nextid
  8. View sum of memory allocated to VMs and CTs: grep -R memory /etc/pve/local | awk '{sum += $NF } END {print sum;}'
  9. View sorted list of VMs like vmid proxmox_host type: cat /etc/pve/.vmlist | grep node | tr -d '":,'| awk '{print $1" "$4" "$6 }' | sort -n | column -t
  10. View sorted list of vmid: cat /etc/pve/.vmlist | grep node | cut -d '"' -f2 | sort -n

KVM Command

  1. List all your KVM machines: qm list
  2. See how much memory your machine 101 has: qm config 101 | grep ^memory
  3. List the memory setting of a kvm: qm config 101 | grep ^memory
  4. restore KVM vzdump backups - see "man qmrestore"
  5. backup utility for virtual machine - see "man vzdump"
  6. unlock kvm: qm unlock 101
  7. Restore a QemuServer VM to VM 601: qmrestore /mnt/backup/vzdump-qemu-888.vma 601

LXC Command

  1. forcefully start lxc: lxc-start -n 101 -F
  2. mount lxc virtual disk: pct mount 101
  3. unmount lxc virtual disk: pct unmount 101
  4. repair virtual disk: pct fsck 101
  5. check configuration of lxc: pct config 101
  6. Remove container: pct destroy 101
  7. Restore a container to a new CT 600: pct restore 600 /mnt/backup/vzdump-lxc-777.tar

OpenVZ Command

  1. utility to control an OpenVZ container - see "man vzctl"
  2. vzctl wrapper to manage OpenVZ containers - see "man pvectl"
  3. display top CPU processes: vztop
  4. cat /proc/user_beancounters
  5. vzlist
  6. backup utility for virtual machine - see "man vzdump"
  7. restore OpenVZ vzdump backups - see "man vzrestore"

if you got anything to share or have any awesome command useful for your day to day Proxmox management, do let me know!

Awesome Useful cPanel Commands

Here are a list of useful commands for everyone under the sun to do their work easily with cPanel

cPanel Resource Usage Stats

To view cPanel’s stats you can run this command via SSH:

/usr/local/cpanel/bin/dcpumonview

This will show all processes, users, etc.

Get cPanel Resource Stats for X Days

If you want to get the stats for a user for say the past 5 days or so, run this command in SSH:

domain="thedomain.com"; for i in `seq 1 7 `; do let i=$i+1 ; let  k=$i-1 ; let s="$(date +%s) - (k-1)*86400"; let t="$(date +%s) - (k-2)*86400"; echo `date -Idate -d @$s`; /usr/local/cpanel/bin/dcpumonview `date -d @$s +%s` `date -d @$t +%s` | sed -r -e 's@^<tr bgcolor=#[[:xdigit:]]+><td>(.*)</td><td>(.*)</td><td>(.*)</td><td>(.*)</td><td>(.*)</td></tr>$@Account: \1\tDomain: \2\tCPU: \3\tMem: \4\tMySQL: \5@' -e 's@^<tr><td>Top Process</td><td>(.*)</td><td colspan=3>(.*)</td></tr>$@\1 - \2@' | grep $domain -A3 ; done

Script to find cPanel account and its corresponding IP address

cat /etc/userdatadomains | perl -pi -e "s/^.*? //," | perl -pi -e "s/==.*==6/ 6/," | perl -pi -e "s/:80==//," | sort | uniq

cPanel script to assign IP via shell: /usr/local/cpanel/bin/setsiteip -u username IPaddress

Courtesy of https://sites.google.com/site/pleskylinuxcom/bash-scripting

If you want to just monitor a specific user and not access the logs you can do so with these commands:

Monitor specific user using TOP

top -c d2 -u username

Monitor all users using TOP

top -c d2

Alternately you can use htop instead of top if you have it installed.

Script to delete Big file

#!/bin/bash
find /home -name '*.DS_Store' -type f -delete &
find /home -name '*.swp' -type f -delete &
find /home -name '*.swo' -type f -delete &
find /home -name 'error_log' -size +10M -type f -delete &
find /home -type f -name '*' -size +500M -exec rm -if {} \; &

In case you are wondering, anything bigger than 500M

find spammer script in cpanel

grep cwd /var/log/exim_mainlog | grep -v /var/spool | awk -F "cwd=" '{print $2}' | awk '{print $1}' | sort | uniq -c | sort -n

the above will look for script that is spamming your cpanel server

find 10 biggest disk user in cpanel

find /home -type d -print0 | xargs -0 du -s | sort -n | tail -10 | cut -f2 | xargs -I{} du -sh {}

the above will search for the 10 biggest folder used by your user

Clear Exim Mail Queue

exiqgrep -zi|xargs exim -Mrm

this will clear all your exim queue to sparkling clean.

Delete cPanel email more than 2 years

find -P /home/*/mail/*/*/cur -mtime '+729';find -P /home/*/mail/*/*/new -mtime '+729'

firing above will delete all email that is bigger than 729 day

check for all unique ip connected to your server

netstat -atun | awk '{print $5}' | cut -d: -f1 | sed -e '/^$/d' |sort | uniq -c | sort -n

useful when you are getting DDOS

ping: icmp open socket: Operation not permitted Centos 6 LXC

If you are facing an issue with Centos 6.8 template in LXC. Showing you the error

[root@server ~]# ping google.com
ping: icmp open socket: Operation not permitted
[root@server ~]# ls -l $( which ping );
-rwsr-xr-x 1 100000 100000 38264 May 10  2016 /bin/ping

everything looks ok but you still can't ping. btw, I'm on unprivileged container. Firing the below works for me.

[root@server ~]# setcap cap_net_raw+ep /bin/ping

and you should be able to ping after that.

Manual Restore Bacula Without Database

OK, another problem i have. I though my data was gone for good although i do remember my Bacula was doing all the backup! And i finally found a way to get those 1TB files back! Well, as much as you don't know anything about Bacula, you do know where those files are stored right? These files are called 'Volume'. And we will be using these volumes to restore our backup! We will be using bacula volume utility tools to assist us in extracting these precious data!

What's in the Bacula Volume?

Before you can do anything at all, the first thing you need to do is to scan your volume to see whether your stuff is located in the volume!

bls -j -V volume-0177 devicenamehere

and the above will show you something like the one below,


Begin Job Session Record: File:blk=0:8814 SessId=161 SessTime=1480534092 JobId=481
   Job=job.name.com.2017-01-20_01.00.00_33 Date=25-Jan-2017 21:26:12 Level=I Type=B
End Job Session Record: File:blk=0:8814 SessId=161 SessTime=1480534092 JobId=481
   Date=25-Jan-2017 22:53:20 Level=I Type=B Files=2 Bytes=942 Errors=0 Status=T

And what's important on the above are SessId and SessTime. So that we can create a Bootstrap file! Create a file call bootstrap.bsr as show below,

Volume = volume-0177
VolSessionId = 161
VolSessionTime = 1480534092

Now, with this information, we will be able to extract the information out of Bacula Volume!

Extracting Bacula Volume?

In order to extract from Bacula volume, there are a few ways to do it. You can either use your bootstrap file as created above and fire the below command

bextract -p -b ./bootstrap.bsr devicename /home

or you can specific which volume you want to extract without using a bootstrap file as show below,

bextract -p -V volume-0177 devicename/home

and file will starts extracting to /home directory where volume-0177 is the file name and devicename is the actual device name you found on /etc/bacula/bacula-sd file that you wish to restore.

The following shows you some options you can add to your command,

Usage: bextract [-d debug_level] <device-name> <directory-to-store-files>
       -b <file>       specify a bootstrap file
       -dnn            set debug level to nn
       -e <file>       exclude list
       -i <file>       include list
       -p              proceed inspite of I/O errors
       -V              specify Volume names (separated by |)
       -?              print this message
  • -p is useful if your backup is like 1TB and it throws off an i/o error after 50 hours of extracting. -p basically prevent that.
  • -i takes in a file path to include only these files or folder to your restoration plan
  • -e takes in a file path to exclude these files or folder out of your restoration plan
  • -V specific a volume as shown on my example
  • -b takes in a file path which is a bootstrap file to tell bextract what you want to do

Now, go save your own ass from getting whoop! Peace out!

Schedule Rsync Backup From Windows to Linux Server

Windows, WHY ARE YOU ALWAYS SO DIFFICULT! Gosh. Damn you are. This time. i wanted to do schedule a backup from my windows server 2012r2 to my linux backup drive. Its as simple as that (while i though it was at least). Google doesn't help with so many rubbish online. Hence, here is a guide that will help us out (me included)

Environment

Enterprise server (Windows 2012 R2)

This is a windows environment server 2012 R2 where our data is

Backup server (Debian Linux)

This is my backup server where i would like to rsync over.


Installation

On Windows server 2012 r2

  • Download cwRsync
  • Unzup cwRsync and copy to "C:\cwRsync".
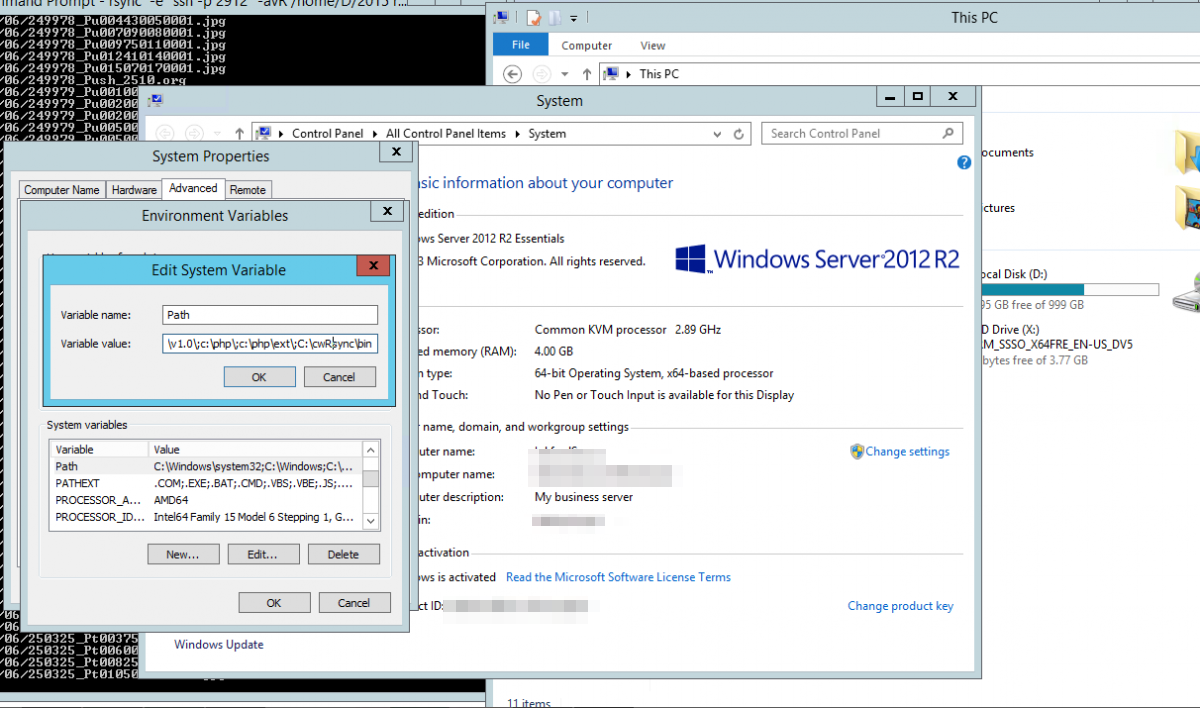
  • Add "C:\cwRsync\bin" to PATH.
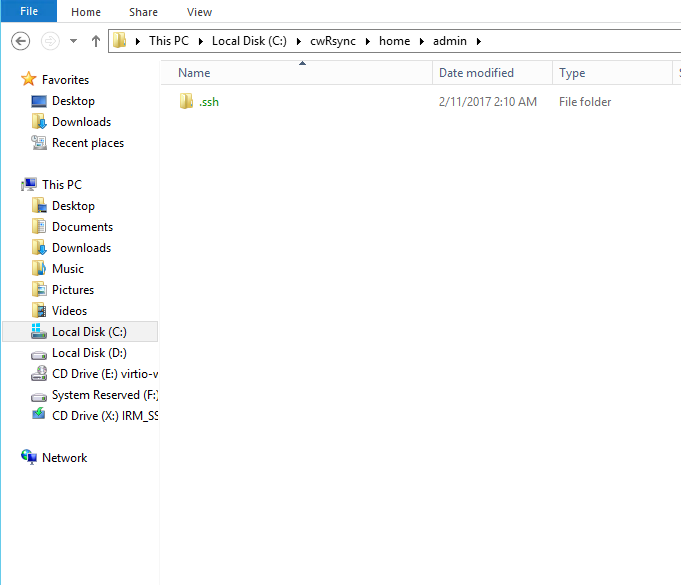
  • Create the directory "C:\cwRsync\home" and "C:\cwRsync\home\USER" (USER should be the name of the user who will run the Rsync in my case its "admin").
  • Create public/private keys with the following command:
  • ssh-keygen -t rsa
    • Paths with "/home/USER/" correspond to the directories that we created in "C:\cwRsync\".
    • Leave the password blank.

On Linux

  • Install openssh-server and rsync.
  • Provide data to a partition (eg.: /backup/).
  • Place the public key in /home/USER/.ssh/ and rename the file to authorized_keys. (assuming its root)

On Windows

  • Test the connection without a password with the following command:
ssh USER@BackupServerIP
  • Test Rsync:
rsync -v -rlt -z --delete "/myfiles/" "USER@BackupServerIP:/backups/"
  • where cygdrive is the directory on C:\cygdrive so the above  C:\cygdrive\myfiles
  • To Test Other port
rsync  -e "ssh -p 14000" -arv "--exclude=.svn/" /myfiles USER@BackupServerIP:/backups/
  • Create a bat file with the rsync command and place it in C:\cwRsync\bin.
  • Schedule execution every day at 0:30 (half past midnight).

Helpful Resources

  • http://stackoverflow.com/questions/34147565/rsync-uid-gid-impossible-to-set-cases-cause-future-hard-link-failure-how-to
  • http://www.smellems.com/tiki-read_article.php?articleId=14