Tutorial: How to optimize wordpress plugin for SEO

This tutorial demonstrate a simple way to optimize your wordpress plugin for SEO purposes. It is always better to optimize some of your plugin if they are not doing their job properly.

What plugin required to optimize?

As we all know that the most important things should be placed on the header of the page. If our plugin place a script or a style on the header, it is important to bring them down so that search engine don't look at them as important. The most appropriate place is on the footer where the search engine spider prioritize the lowest among other section. ( unless you place your side bar below footer, footer usually is placed as lowest priority).

Identifying wordpress plugin that are not optimize

Identifying wordpress plugin that are not optimized for SEO can be both easy and difficult. If the plugin provided clues for your changes, it will be easily known which plugin has caused this mistake. However, if the instruction have no inserted any code to identify which plugin does the instruction belong, it will be more tricky than usual. In order to do this, i have illustrate it below.

1. Go to your website and right click on your page. Select view source to look at the source of your page to identify any unnecessary instruction that you do not want the search engine spider to see first.

right click image
right click image
source code
source code

2. notice that the source code i have provided above has a style tag with all its style in it? This is the plugin that should be updated to optimize for SEO. In the style tag, there are classes that indicate that it is from addtoany, with this i can identify that the plugin is "Add to Any: Share/Save/Bookmark Button".

How to optimize my wordpress plugin?

Optimizing your wordpres plugin for SEO is not that difficult. We just have to instruct the affected plugin to list those script or style to the footer as wordpress has provided a method wp_footer while your plugin most probability is using wp_head which caused it to place those unnecessary instruction on the header instead. After we identify our plugin, it is time to move those style sheet to the footer!

3. Go to your wordpress control panel and select plugin->editor->Add to Any: Share/Save/Bookmark Button

editor in wordpress image

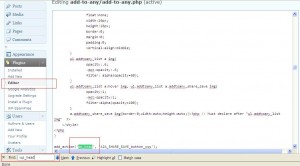
4. press Ctrl-F or edit->find in your browser and search for the word wp_head
search wp_head
search wp_head

5. change the found wp_head to wp_footer and click update

update file
update file

6. search for any other wp_head and change them all to wp_footer if necessary.

7. look at your home page source code again and it should have disappeared and went down to footer.

result of optimization

Note

There are things to take note about when trying to do the above steps. For all style it can be placed on the footer with no problem. However, for those javascript, please check properly before placing javascript or <script> tag to the bottom of the page as it will cause problem for some of the plugin since the methods are being called in the body before your scripts have imported into the page. Therefore, it cannot find those javascript methods if it is placed on the bottom. So we must check that the script has been imported before calling it within the body tag if we want to move the script tag to the bottom of the page.

Tutorial: How to Create your own jQuery Flip effect plugin

It is always annoying to look at codes that are created in a plugin or website  that perform millions of complicated actions without comments to find the one effects contain in the plugin.

In this tutorial, i will demonstrate an easy to create  jQuery flip effect with minimum amount of complication so that you will be able to inherit this effect into your plugin.

Before we start, i believe the below resources will be useful to create your own simple flip effect program plugin

Once you read the above tutorial, you should have an idea how jQuery flip actual work. The key point to flip is speed. And in order to create a jQuery flip effect plugin, we will apply the same concept on all other types of effect that is being used in other tutorial. Of course, the demo guy will be the ghost again. Opps. You can view the demo page below,

demo-rawrflip

Explanation

In order for the flip to work. There must be a swap between two images or containers. If there is only one element, we don't really need the flip effect on it.  The code for the demo above can be seen via view source or the one that i'm going to show below,

$(function(){

var alt = 0;
$('#flipMe').click(function(){
alt%2 == 0?
$(this)
.css('background-color', '#000')
.animate({height:50+'px', width: 0+'px', marginLeft: 25+'px'},140)
.css('background-color', '#555')
.animate({height:50+'px', width: 50+'px', marginLeft: 0+'px'},240):
$(this)
.css('background-color', '#555')
.animate({height:50+'px', width: 0+'px', marginLeft: 25+'px'},140)
.css('background-color', '#000')
.animate({height:50+'px', width: 50+'px', marginLeft: 0+'px'},240);
alt++;
})
});

i attached an event click to the image tag so that whenever user click on the image it will flip. There is a bit of maths in here so that we can determine user click by using modulus. The important part for flipping to occurs is shown below,

.animate({height:50+'px', width: 0+'px', marginLeft: 25+'px'},140)

whereby it compress the image at the center and flip it out from the center again which creates a flip effect when its quick enough. If the speed of the animate function is set to a larger value such as 2000, you will notice the flip effect became a zoom effect instead. Throw this into a plugin code and you get yourself a very simple jQuery flip effect plugin!

Tutorial: jQuery effect – how to shrink/zoom at the center of a container

jQuery provides a basic effect of sliding in and out. However, in other to create other form of effect we will have to apply animate function provided by jQuery. This tutorial will demonstrate of using animate function in jQuery to perform a shrink function at the center of an element  that you often see in Gallery and other types of plugin.

It is not difficult to create a method to demonstrate a shrink in and out effect with animate function. The concept used here is to opposite the natural direction of the sliding jQuery provides in order to zoom in the image shows below.

image to be zoom
image to be zoom

Yes! Its RAWR! cute ghost, i was lazy to find a proper picture so i just grab him down to play with.  Now, in order to shrink him properly, we will have to use the plugin i created just for him. I will also explain what does this simple plugin does. You can have a look at the demo below,

demo-rawrzoom

PS: There is another method which is  a bit more complex than this one which you can see from here

So, how does the plugin work? Simple! it's just pure animate function from jquery with css. Illustrator the code below.

$(selector).stop(true,false)
.animate({
height: options.zoomSize+'px',
width: options.zoomSize+'px',
marginTop: ((oriH-options.zoomSize)/2)+'px',
marginLeft: ((oriW-options.zoomSize)/2)+'px'
}, options.duration)

What it does here is to shrink it to the size you define and move opposite accordingly. Let's assume height: and width: move upwards and right respectively while it shrink. So marginTop: and marginLeft: will move downwards and left respectively so that our eyes will illustrate the shrink on the center of the box! hopes this help!

Usage

An example on how to use this plugin from the demo site. The parameter is optional.

$('#zoomMe').zoom(
{
zoomWidth: 10,
zoomHeight: 10,
duration: 3000
}
);

or

$('#zoomMe').zoom();

Parameter

The optional parameter for this plugin is as follow,

  • zoomwidth: the width you wish it to be minimize default its 10
  • zoomheight: the height you wish it to be minimize defaults its 10
  • duration: time for zoom to be complete defaults its 5000

You can download the plugin from

Tutorial: How to draw a flower petal using Adobe Illustrator

This is a tutorial on how to draw a simple flower petal using Adobe Illustrator. I use Adobe Illustrator CS4, but most of the tools are the same in the earlier versions.

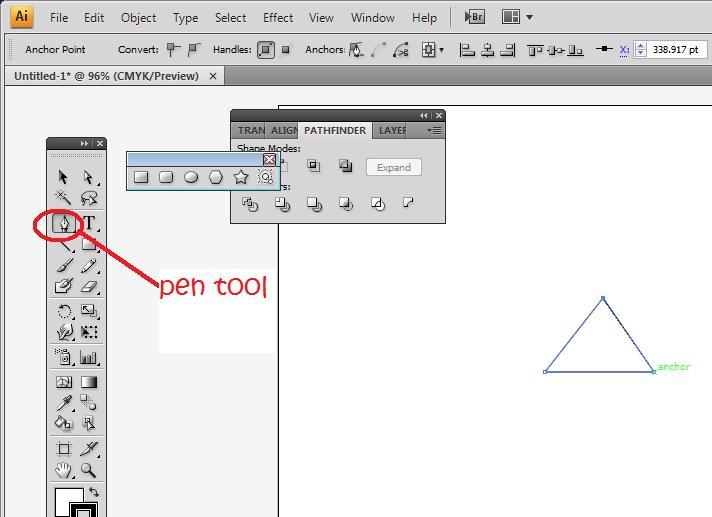
With the pen tool, draw a triangle. Join all the dots.

triangle

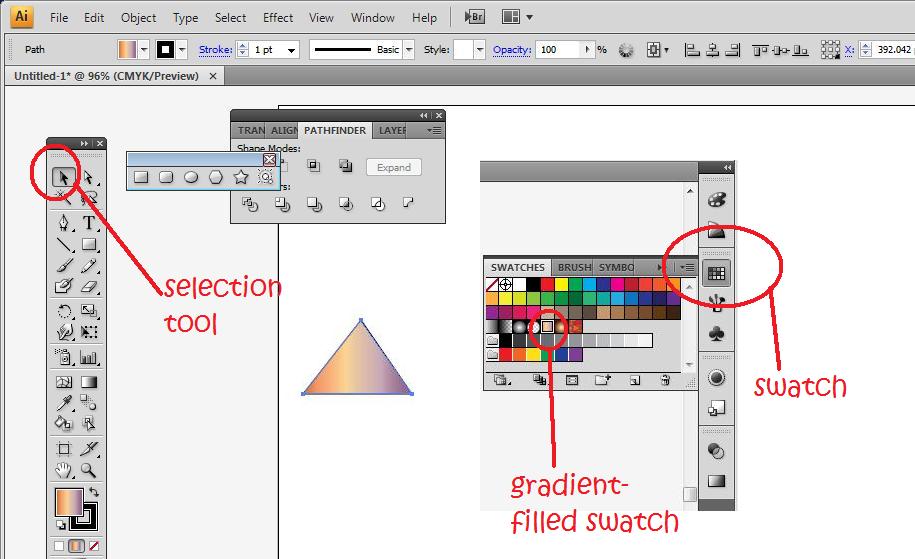
Then select the path with the selection tool (V) and clicking on swatch, select a gradient filled swatch to fill in the triangle. Illustrator is annoying in a way that it doesn't allow you to fill in a coloured gradient just by clicking on gradient.

gradient-filled swatch

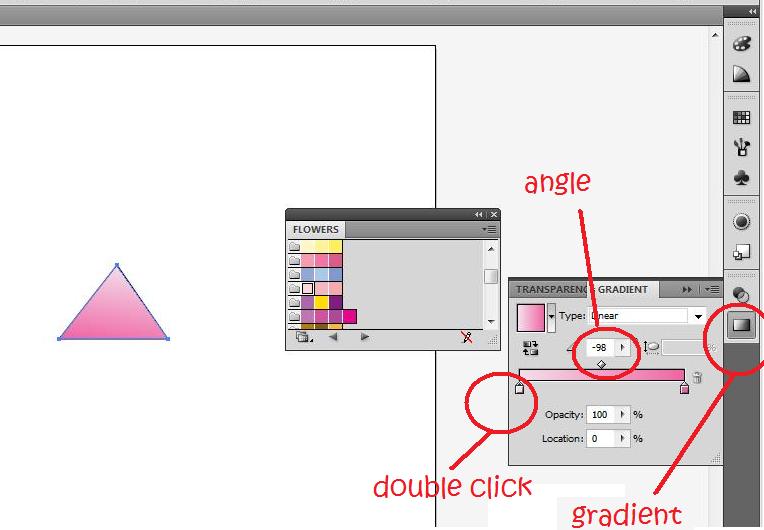
Next, click on gradients (Window>Gradients). Select the linear gradient. I chose a light pink (double click on the square on the gradient bar to choose the colour) followed by a darker pink on the gradient bar. I then changed the angle of the gradient to -98 to that the light pink is at the tip of the triangle.

fillgradientcolour

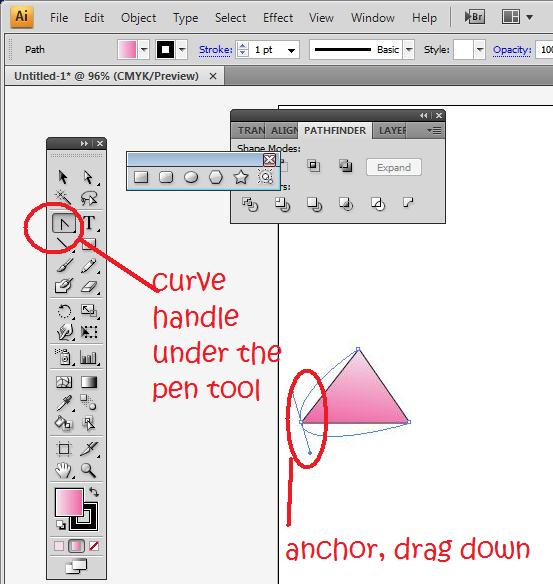
Next by clicking on the curve handle tool, which is hidden under the pen tool (hold the click of the pen tool and choose the curve handle). I click on the anchor on the bottom left of the triangle and drag downwards. This would result in a curved path.

flowerpetal4

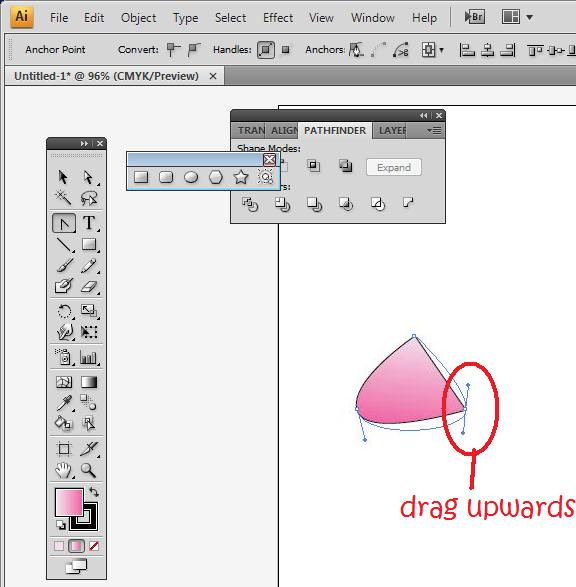
I then click on the right anchor and drag it upwards instead of downwards. You should adjust so that the petal shape that you want is achieved.

rightanchor

If the tip of the petal is too sharp, use the curve handle to change the shape. In the end, you get a petal that looks like this!

complete flower petal

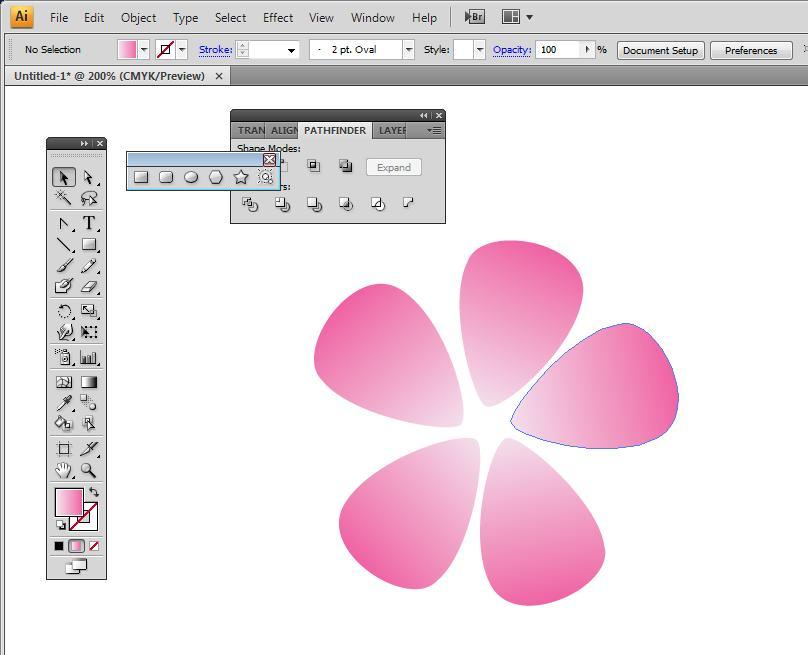
You can do countless things with this. I duplicated it five times and rearranged it to look like a flower, or you can even duplicate it and rotate it around to achieve the image of falling petals.

complete flower

Tutorial: How to slide downwards with jQuery

Sliding upwards is easy enough but finding a solution to slide downward seems to be a problem that i encounter. Searching for open source plugin for reference just takes too much time to just find the plugin that perform a downwards slide. My best bet is just brainstorm an idea to make jQuery slide downward.  To my luck, i successfully make my element slide downwards without any big complicated code.  The idea was farely simple, in order to slide downwards, we have to force jQuery to act as if it is sliding downwards. Since jQuery slide element upwards in default, we have no way but to trick the user eyes to make our element pretend to slide downwards. In order to do that, we constantly force our element to move downward while jQuery slide it upwards. This way we get a downward slide from jQuery. Illustrate the following code,


$('div#menu li').each(function() {
oriH = $(this).height();
opac = $(this).css('opacity');
$(this).hover(
function(){
$('div#menu li').not(this).stop(true,false)
.animate({height: '1px', marginTop: oriH+'px'}, options.duration).fadeTo(1,0);
}
,
function(){
$('div#menu li').not(this).stop(true,false).fadeTo(1,opac)
.animate({height: oriH , marginTop: '0px'}, 1500);
});
});

The code above attach an event handler to each object list item in the menu. The event, hover, will slide down all other neighbor list item other than itself. Notice that the animate height is adjusted to height 1px so that elements that are being slide downward do not cause disorder among the list. While, the list items are being pushed upwards, at the same time, we push the margin downwards using the marginTop element.