Java (J2SE) Universal Turing Machine And Multiplication/Factorial/Ackerman Simulator

This is an assignment questions to create a turing machine that perform a simple task, multiplication, factorial, n xn and ackerman function given an input. I am not going to give a lecture on what is universal turing machine and how my simulator work but this should gives people an idea on how you can build a simple universal turing machine and other simulator easily.

Universal Turing Machine

My universal turing machine is some how "cheap". It basically read a string and moves according to how the simulator has instructed it to do. Here is the code of my universal turing machine in Java(J2SE).

public String UTM(String input, String[][] simulator){
        int pointer = 0;
        int state = 0;
        boolean stop = false;
        while(true){
            String[] tmp = input.split("(?!^)");
            for(int i = 0; i < simulator.length;i++){
                if(simulator[i][1].equalsIgnoreCase(tmp[pointer]) && simulator[i][0].equalsIgnoreCase(String.valueOf(state))){
                    tmp[pointer] =  simulator[i][2];
                    if(simulator[i][3].equalsIgnoreCase("R"))
                        pointer++;
                    else if(simulator[i][3].equalsIgnoreCase("L"))
                        pointer--;
                    else if(simulator[i][3].equalsIgnoreCase("STOP"))
                        stop = true;
                    state = Integer.parseInt(simulator[i][4]);
                    break;
                }
            }
            if(stop){
                input = implode(tmp, "");
                break;
            }else{
                input = implode(tmp, "");
                System.out.println("Result = "+input + " AT state " + state + " looking at item = "+ pointer + " "+tmp[pointer]);
            }
        }
        
        return input;
    
    }
    public String implode(String[] ary, String delim) {
        String out = "";
        for(int i=0; i<ary.length; i++) {
            if(i!=0) { out += delim; }
            out += ary[i];
        }
        return out;
    }

The Universal turing machine takes in an input and a simulator in this case our simulator is an 2D array of instruction.

Simulator

My simulator is build in a 2D array of strings as mention previously. Here is an example of my simulator in an array.

 String[][] Q1 = {
            {"0", "_", "_","R", "0"},
}

And here is the explanation on what each column means.

  1. Current State
  2. Found Symbol
  3. Replace Symbol
  4. Move Direction (R - Right, L - Left)
  5. Move to State

Basically my simulator is that simple.

Multiplication Simulator

Now, i will provide you with my multiplication simulator with the following number of state required to calculate the multiplication of two numbers.

String[][] Q1 = {
            {"0", "_", "_","R", "0"},
            {"0", "1", "1","R", "0"},
            {"0", "0", "_","R", "1"},
            {"1", "0", "0","R", "1"},
            {"1", "1", "0","L", "2"},
            {"1", "_", "_","STOP", "2"},
            {"2", "0", "0","L", "2"},
            {"2", "_", "_","L", "3"},
            {"3", "0", "0","L", "3"},
            {"3", "_", "_","STOP", "3"},
            {"3", "1", "0","R", "4"},
            {"4", "0", "0","R", "4"},
            {"4", "_", "_","R", "5"},
            {"5", "0", "0","R", "5"},
            {"5", "1", "1","R", "5"},
            {"5", "_", "_1_","L", "6"},
            {"6", "1", "1","L", "6"},
            {"6", "0", "0","L", "6"},
            {"6", "_", "_","L", "7"},
            {"7", "0", "0","L", "7"},
            {"7", "1", "0","R", "8"},
            {"7", "_", "_","R", "10"},
            {"8", "0", "0","R", "8"},
            {"8", "_", "_","R", "9"},
            {"9", "1", "1","R", "9"},
            {"9", "0", "0","R", "9"},
            {"9", "_", "_1","L", "6"},
            {"10", "0", "1","R", "10"},
            {"10", "_", "_","R", "11"},
            {"11", "0", "0","R", "11"},
            {"11", "1", "0","L", "13"},
            {"11", "_", "_","STOP", "12"},
            {"13", "0", "0","L", "13"},
            {"13", "_", "_","L", "7"}
        };

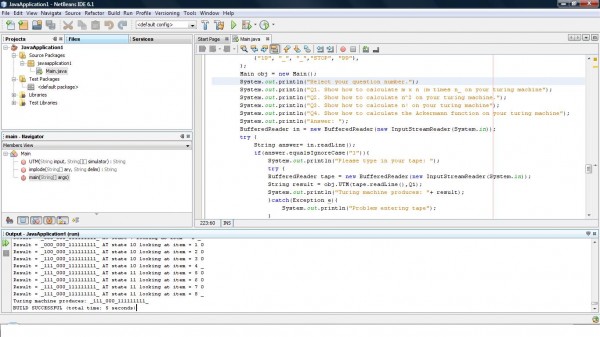
Well, you can see this takes 13 state to compute multiplication on a turing machine. The above doesn't make a sense to people who don't know what is a turing machine. It's like programming using your brain rather than a IDE editor when you are writing a simulator for a turing machine. Anyway, you can draw a diagram using the above instruction too. eg. input i placed in is "_1110111_". Calualte all the '1' on the right and stop when you see '_' to get your answer.
N x N Simulator

N x N simulator is fairly simple once you get multiplication to work. All you need to do is to clone the number into your input and perform a multiplication.

String[][] Q2 = {
            {"0", "_", "_","R", "1"},
            {"1", "0", "0","R", "1"},
            {"1", "1", "0","R", "2"},
            {"1", "_", "0","STOP", "99"},
            {"2", "1", "1","R", "2"},
            {"2", "_", "_","L", "3"},
            {"3", "1", "10","R", "4"},
            {"3", "0", "101","STOP", "99"},
            {"3", "_", "_","STOP", "99"},
            {"4", "0", "0","R", "4"},
            {"4", "_", "1_","L", "5"},
            {"5", "1", "1","L", "5"},
            {"5", "0", "_","L", "6"},
            {"6", "1", "1","L", "6"},
            {"6", "0", "0","L", "6"},
            {"6", "_", "_","R", "7"},
            {"7", "0", "0","R", "7"},
            {"7", "1", "0","R", "8"},
            {"7", "_", "_","L", "10"},
            {"8", "1", "1","R", "8"},
            {"8", "_", "_1","L", "9"},
            {"9", "1", "1","L", "9"},
            {"9", "0", "0","L", "9"},
            {"9", "_", "_","R", "7"},
            {"10", "0", "1","L", "10"},
            {"10", "_", "_","R", "11"},
            {"11", "1", "1","R", "11"},
            {"11", "0", "0","R", "11"},
            {"11", "_", "0","STOP", "12"}
        };

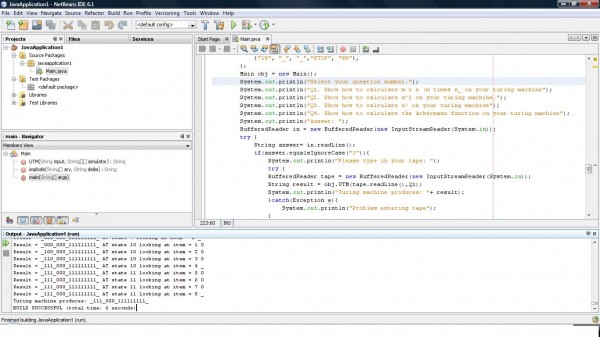
Above shows the simulator for duplicating your input from n to n x n. Once you have finish running this, run the multiplication simulator which will gives you a 24 state turing machine answer (11 + 13). eg. input i placed in is "_111_". Calualte all the '1' on the right and stop when you see '_' to get your answer.
Factorial Simulator

Factorial can be modified from n x n. All you need to do is to modify the graph a little to get factorial answer. Please take note that my answer has not been optimized (i'm simply lazy to optimize for an assignment).

String[][] Q3 = {
            {"0", "_", "_","R", "1"},
            {"1", "0", "0","R", "1"},
            {"1", "1", "0","R", "2"},
            {"1", "_", "_","STOP", "99"},
            {"2", "1", "1","R", "2"},
            {"2", "_", "_","L", "3"},
            {"3", "1", "10","R", "4"},
            {"3", "0", "1","STOP", "99"},
            {"3", "_", "_","STOP", "99"},
            {"4", "0", "0","R", "4"},
            {"4", "_", "1_","L", "5"},
            {"5", "1", "1","L", "5"},
            {"5", "0", "_","L", "6"},
            {"6", "1", "1","L", "6"},
            {"6", "0", "0","L", "6"},
            {"6", "_", "_","R", "7"},
            {"7", "0", "0","R", "7"},
            {"7", "1", "0","R", "8"},
            {"7", "_", "_","L", "10"},
            {"8", "1", "1","R", "8"},
            {"8", "_", "_1","L", "9"},
            {"9", "1", "1","L", "9"},
            {"9", "0", "0","L", "9"},
            {"9", "_", "_","R", "7"},
            {"10", "0", "1","L", "10"},
            {"10", "_", "_","R", "11"},
            {"11", "0", "0","R", "11"},
            {"11", "1", "1","R", "11"},
            {"11", "_", "0","R", "12"},
            {"12", "1", "1","R", "12"},
            {"12", "_", "_","L", "13"},
            {"13", "1", "_","L", "14"},
            {"14", "1", "1","L", "14"},
            {"14", "0", "0","L", "14"},
            {"14", "_", "_","R", "15"},
            {"15", "1", "1","R", "15"},
            {"15", "0", "_","R", "16"},
            {"16", "0", "0","R", "16"},
            {"16", "1", "0","L", "17"},
            {"17", "0", "0","L", "17"},
            {"17", "_", "_","L", "18"},
            {"18", "0", "0","L", "18"},
            {"18", "1", "0","R", "19"},
            {"19", "0", "0","R", "19"},
            {"19", "_", "_","R", "20"},
            {"20", "0", "0","R", "20"},
            {"20", "1", "1","R", "20"},
            {"20", "_", "_1_","L", "21"},
            {"21", "1", "1","L", "21"},
            {"21", "0", "0","L", "21"},
            {"21", "_", "_","L", "22"},
            {"22", "0", "0","L", "22"},
            {"22", "1", "0","R", "23"},
            {"22", "_", "_","R", "25"},
            {"23", "0", "0","R", "23"},
            {"23", "_", "_","R", "24"},
            {"24", "1", "1","R", "24"},
            {"24", "0", "0","R", "24"},
            {"24", "_", "_1","L", "21"},
            {"25", "0", "1","R", "25"},
            {"25", "_", "_","R", "26"},
            {"26", "0", "0","R", "26"},
            {"26", "1", "0","L", "27"},
            {"26", "_", "_","L", "28"},
            {"27", "0", "0","L", "27"},
            {"27", "_", "_","L", "22"},
            {"28", "0", "1", "R", "29"},
            {"28", "1", "1", "L", "28"},
            {"28", "_", "_", "R", "32"},
            {"29", "1", "1", "R", "29"},
            {"29", "_", "_", "R", "30"},
            {"30", "1", "1", "R", "30"},
            {"30", "_", "_1", "L", "31"},
            {"31", "1", "1", "L", "31"},
            {"31", "_", "_", "L", "28"},
            {"32", "1", "1", "R", "32"},
            {"32", "_", "_", "R", "33"},
            {"33", "1", "1", "R", "33"},
            {"33", "_", "_", "R", "34"},
            {"34", "1", "1", "R", "34"},
            {"34", "_", "_", "L", "35"},
            {"35", "1", "_", "L", "36"},
            {"36", "_", "_", "STOP", "36"},
            {"36", "1", "1", "L", "37"},
            {"35", "_", "_", "STOP", "35"},
            {"37", "1", "1", "L", "37"},
            {"37", "_", "0", "L", "38"},
            {"38", "1", "1", "L", "38"},
            {"38", "_", "_", "R", "15"},
        };

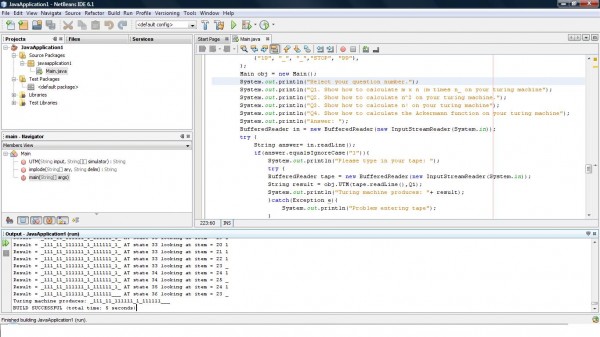
It takes 38 state to compute factorial in my case but this can obviously to optimized (i saw many redundancy when i was writing this but i need to save time as its quite a last minute work before exam). All of these shouldn't be a problem as the logic is fairly simple. The real problem comes when ackerman function required you to recursive multiple sections. eg. input i placed in is "_111_". Calualte all the '1' on the right and stop when you see '_' to get your answer.
Ackerman Function Simulator

This is not fun but its rewarding if you manage to get the answer. Here is the simulator.

String[][] Q4 = {
            {"0", "_", "_","R", "1"},
            {"1", "0", "0","R", "2"},
            {"1", "1", "1","R", "1"},
            {"2", "1", "0","L", "3"},
            {"2", "_", "_","L", "9"},
            {"3", "0", "_","L", "4"},
            {"4", "0", "0","L", "4"},
            {"4", "1", "0","R", "5"},
            {"4", "_", "_","R", "18"},
            {"5", "0", "0","R", "5"},
            {"5", "_", "_1","L", "6"},
            {"6", "_", "_","R", "7"},
            {"6", "1", "0","R", "5"},
            {"6", "0", "0","L", "6"},
            {"7", "_", "_","L", "8"},
            {"7", "0", "1","R", "7"},
            {"8", "1", "0","R", "0"},
            {"9", "0", "1","L", "10"},
            {"10", "1", "0","L", "11"},
            {"10", "_", "_","STOP", "99"},
            {"11", "_", "1","R", "13"},
            {"11", "1", "1","L", "12"},
            {"12", "1", "1","L", "12"},
            {"12", "_", "_","R", "1"},
            {"13", "1", "1","R", "13"},
            {"13", "0", "1","R", "13"},
            {"13", "_", "_","L", "14"},
            {"14", "1", "_","L", "15"},
            {"15", "1", "1","L", "15"},
            {"15", "0", "0","L", "16"},
            {"16", "_", "1","R", "17"},
            {"16", "1", "1","L", "12"},
            {"17", "1", "1","R", "17"},
            {"17", "0", "1","R", "17"},
            {"17", "_", "_","L", "14"},
            {"18", "_", "1","R", "19"},
            {"19", "0", "1","R", "19"},
            {"19", "1", "1","R", "19"},
            {"19", "_", "_","STOP", "99"},
        };

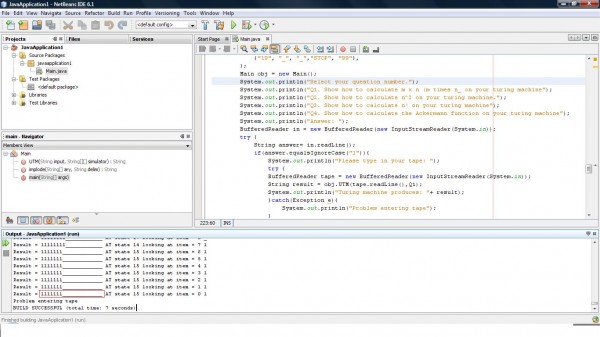
I manage to create an ackerman function with a 19 state while you might need to create 50-100 state to perfect an ackerman function (my classman has 120+ state). Anyway, this ackerman function IS buggy but it should be good enough to give you some hints or an idea after you have drawn the diagram of this simulator. You will find that this ackerman function ends with a missing starting symbol! Short to say, the turing machine ends when it hits an empty string while replacing the starting symbol as a value. I will show you rather than explaining. eg. input i placed in is "_11011_". Calualte all the '1' to get your answer. Do take note of the highlighted answer. The total seems correct but it actually violated the term 'turing machine' as it didn't stop at the halt state but stop due to the exception of access an empty index on the string array (-1 in this case). Hehe, good luck.
Input

Here is the explanation of my input.

  1. "_" - this is the start and end point
  2. "0" - this is the multiplication symbol (its not always the case when its IN the simulator, i'm talking about the input here 🙂
  3. "1" - this is the value

pretty simple and i keep the same rule for the whole 4 question. All the answer can be found on the right side or left with the number '1'.

Java Code

here is the source code of the whole thing.

Conclusion

The material above is use to serve as a reference for your work. It serves as a starting point on "how to do?" question.

Get WordPress Author Page Url With User ID

Here is another WordPress tip for people who face problem finding the function to retrieves WordPress author page url using a particular user id. I did find a lot of WordPress functions that require them to be used within the loop. However, i need a particular function which takes in a user id as a parameter and provide the author page url to me outside the loop. I spend some time searching on Google but couldn't find a decent page that provide me with this information (well, i found a lot of junk page around the internet nowadays though.). Hence, i went into the core and look for it myself. Lucky there was such function!

WordPress Get Author Page Function

if you try to find the author core functions codes, it will lead you to wp-include/author-template.php file. Once you scan through the functions within the file, you will notice that there are only a few methods that take in parameters. Hence, its not that difficult to find. On line 197 you will notice the function get_author_posts_url as shown below,

function get_author_posts_url($author_id, $author_nicename = '') {
	global $wp_rewrite;
	$auth_ID = (int) $author_id;
	$link = $wp_rewrite->get_author_permastruct();

	if ( empty($link) ) {
		$file = get_option('home') . '/';
		$link = $file . '?author=' . $auth_ID;
	} else {
		if ( '' == $author_nicename ) {
			$user = get_userdata($author_id);
			if ( !empty($user->user_nicename) )
				$author_nicename = $user->user_nicename;
		}
		$link = str_replace('%author%', $author_nicename, $link);
		$link = get_option('home') . trailingslashit($link);
	}

	$link = apply_filters('author_link', $link, $author_id, $author_nicename);

	return $link;
}

And you can use this function this way

$curauth = get_userdata(get_query_var('author'));
$current_link = get_author_posts_url($curauth->ID,$curauth->display_name);

You can don't provide the second parameter, display_name but it is advisable to do so as you will notice above that the core function will try to retrieve from the database if you omit the second parameter which also means an additional sql query which is not something we want 🙂

Customize WordPress Avatar Using Filter Hook

WordPress have an excellent feature for providing individual thumbnail within your WordPress blog. However, most of us are aware that most users who have a customize thumbnail image are usually those who sign up with Gravatar and the rest of the user will only have their default image provided by WordPress. Some of us will want a customize WordPress Avatar for our logged in user or customize the default WordPress image rather than using the default one. This is possible using filter hook that is currently not documented in WordPress to provide a customize avatar for individual logged in user. On the other hand, default image can also be overwrite so that you can have your own set of avatar uniquely for your WordPress blog.

Default WordPress Avatar

Rather than using WordPress default avatar, there is an easy way to customize the default WordPress Avatar even without using any filter hook. Here is how you do it.

<?php echo get_avatar( $comment->comment_author_email, 100, get_template_directory_uri()."/images/face.jpg" ); ?>

Notice that get_avatar is the recommended way to get avatar from WordPress and this is usually located in your WordPress theme. This function allows you to change the default WordPress avatar by providing a customize path to the default WordPress avatar. You can also create your own set of random avatar using this method. (either using another table in your database or just use the php method random to randomly select an image)

Customize WordPress Avatar With Filter Hook

Another way of customizing WordPress Avatar is to use a filter hook provided by WordPress. I found this accidentally while customizing WordPress for one of my project needs. The filter hook that was given within the method of get_avatar was this.

			add_filter('get_avatar', array($this,'site_get_avatar'), 10, 5);

Notice that the new filter was get_avatar which is also the method given in WordPress to display any avatar. Take note that i also provide the third and fourth parameter. The fourth parameter is important so that our method site_get_avatar have the appropriate value for us to work with, without the fourth parameter, you won't be able to retrieve other information other than the avatar given by WordPress itself. You will understand this better after i have provided the method site_get_avatar as shown below,

function site_get_avatar($avatar, $id_or_email, $size, $default, $alt){
	//$avatar format includes the tag <img>
	$imgpath = "http://website.com/image/myownimage.jpg";
	$my_avatar = "<img src='".$path."' alt='".$alt."' height='".$size."' width='".$size."' />";
	return $my_avatar;
}

The above method contains 5 parameters which are describe below,

  1. $avatar: the avatar given by WordPress with the tag . This is not the path of the default image.
  2. $id_or_email: this is the email or id of the user
  3. $size: size of the image
  4. $default: this should be the default image provided by WordPress or the path given by us when we used get_avatar (third parameter as shown previously)
  5. $alt: this is the alt value given in your img tag.

Previously, i mention that the fourth parameter in the filter hook is important right? The reason is that if the fourth parameter is not provided in your filter hook, the value for number 2 onwards will not be provided by WordPress to your custom method, site_get_avatar. You will only get the value $avatar in default. Hence, the fourth parameter is important 🙂

WordPress Customize Avatar

Depending on what you need, this action hook is actually quite useful for customizing WordPress avatar. You can abandon this hook if you just want to customize the default image provided by WordPress. However, if you wish to customize each user avatar without using Gravatar, you will definitely find this pretty useful! Good luck!

Change WordPress Default From Email Address Without Plugin

In WordPress, there is this default WordPress email, [email protected] where ALL WordPress installation will have. This default email is used on all your WordPress blog From address whenever you or your user receives an email from your WordPress blog. You will also notice that WordPress default email name is 'Wordpress' too instead of your own WordPress blog name. Something like the image shown below,

Well, having a default wordpress email address and name wasn't that bad but sometimes you would like to place it with your own branding name so that your users know its you instead of WordPress or something that is not associated with WordPress. If you search online, you will definitely find some ready made plugin available on the market but you might not want them due to various result such as efficiency, customization and etc. Furthermore, this is really easy to achieve and doesn't really required any plugin that might affect your WordPress blog performance.

WordPress Email Hook

The main thing we need to be aware of are the hooks needed to change the default WordPress From email addresses. If you dig into WordPress wp_mail function, you can easily notice there are two hooks that allow you to do this.

<pre class="brush: php; title: ; notranslate" title=""><br />add_filter('wp_mail_from','_fromMail');<br />add_filter('wp_mail_from_name','_fromMailName');<br />

The above are the two filter hooks that are required to change your default WordPress from email address.


WordPress Email Hook Functions

So we have our hooks, the next thing is to provide the function to change the name of the default email from address.

<pre class="brush: php; title: ; notranslate" title=""><br /><%%KEEPWHITESPACE%%>		function _fromMail($email){<br /><%%KEEPWHITESPACE%%>			return "[email protected]";<br /><%%KEEPWHITESPACE%%>		}<br /><%%KEEPWHITESPACE%%>		function _fromMailName($name){<br /><%%KEEPWHITESPACE%%>			return "Go Where Eat";<br /><%%KEEPWHITESPACE%%>		}<br />

It's pretty simple to understand from the above code, we are just passing in our name and email to overwrite the one given by WordPress.


Change WordPress Default From Email

For those who are not familiar with PHP coding and couldn't understand what the above means, all you need to do is to copy the below code to either a new plugin file or your function.php file in your theme folder and change the name and email address to the one you prefer.

<pre class="brush: php; title: ; notranslate" title=""><br />add_filter('wp_mail_from','_fromMail');<br />add_filter('wp_mail_from_name','_fromMailName');<br /><%%KEEPWHITESPACE%%>		function _fromMail($email){<br /><%%KEEPWHITESPACE%%>			return "[email protected]";<br /><%%KEEPWHITESPACE%%>		}<br /><%%KEEPWHITESPACE%%>		function _fromMailName($name){<br /><%%KEEPWHITESPACE%%>			return "Go Where Eat";<br /><%%KEEPWHITESPACE%%>		}<br />

For coders, this should be a piece of cake for you.


WordPress Template_page meta key and update_post_meta

This post will be a fairly simple and straight forward one. It has been a long time since i wrote anything on Hungred Dot Com. I really like to write more regarding my experiences during each of my project and some useful designing list that i would like to keep but i just can't seems to get the time. Nonetheless, i would still write such article that i couldn't find on Google to share with people who needs it.

Template_page Meta Key

Since 9 of January 2009, WordPress has removed template_page key from wp_insert_post from the table wp_post to wp_meta_post. Therefore, some of you who are looking for this particular key to insert customize template will find difficulty as there are no documentation of any kind that allows you to work this out peacefully. The changes will require user to use update_post_meta in order to interact with wp_meta_post table. Hence, our main concern here is the exact key used to update any particular post/page template using the method update_post_meta. I dig around and found out that WordPress no longer uses Template_page as the key but uses _wp_page_template as the key for our meta post table. Hence, you will write something like this in order to update a particular post/page template.

update_post_meta($id, "_wp_page_template", "new_template.php");

The third parameter will require you to place in the exact file name plus extension. Without extension but pure name won't work. Once this sentence is being executed, your post which has the id in the variable $id will have new_template.php as its own template! Enjoy!