Ok, i lied, there is no easy way to resize kvm but it's pretty fast if you know what you are doing. Finding Proxmox VE resources isn't very easy since not many people are actually writing this to share their knowledge across. I figured that i should write down how i resize my KVM environment on a Centos 6.6 environment that i have for a KVM vm to better illustrate how this can be done quickly
Requirement
Before i start let me explain what you need to have on your hard disk setup within your Linux VM environment. Your harddisk must be setup with LVM also known as logical volume manager. At least this is how i setup my hard disk, if not, you will need to do a huge around of crap just to resize your KVM environment.
Reszing linux KVM
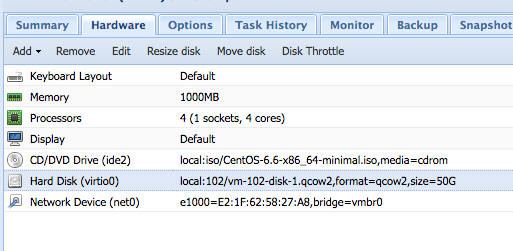
On Proxmox, it's pretty simple, if you want to resize a particular VM, just click on it and hit on "Hardware" as shown below,
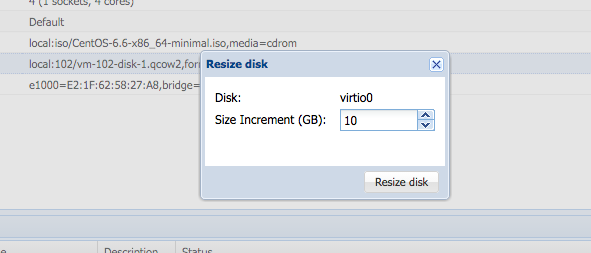
Make sure your VM is off and hit on 'Resize disk' and this will pop out.
And you will notice that nothing happens! Ha ha! Just Kidding! but seriously, nothing will happen if you start your vm and look at your machine size but still, start your VM. And hit on
<pre class="brush: php; title: ; notranslate" title="">
df -kh
and you will see my initial hard disk space
45G is my initial hard disk space and /dev/mapper/VolGroup-lv_root is my logical volume. Now, before i go crazy, i need to check whether the 10G that i just added is indeed in my machine. I can do this by hitting
<pre class="brush: php; title: ; notranslate" title="">
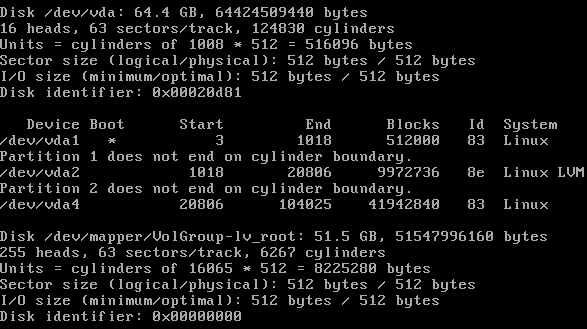
fdisk -l
and you will see the following
which indicate that my 10GB has been added into the machine (eh, yeah i have 50GB and now i added 10GB so i should have 60GB) and do take note of my drive name '/dev/vda'
Partitioning the new disk
We want to create a new partition by using the disk utility below,
<pre class="brush: php; title: ; notranslate" title="">
fdisk /dev/vda
which will provide you with an interactive console, that you will use to create the partition.
Enter the commands in the following sequence:
<pre class="brush: php; title: ; notranslate" title="">

Command (m for help): n

Command action
   e   extended
   p   primary partition (1-4)
p

Partition number (1-4): 4

First cylinder (1-1305, default 1): 1

Last cylinder, +cylinders or +size{K,M,G} (1-1305, default 1305): +9500M

Command (m for help): w
Since i have partition number 1-3, so i create 4 and from there on, just use the First cylinder default and last cylinder would be the number of size i am going to add, in this case, it is 9.5G as 0.5G just got suck off somewhere.
Now executing the following will show you that our changes have been made to the disk:
<pre class="brush: php; title: ; notranslate" title="">
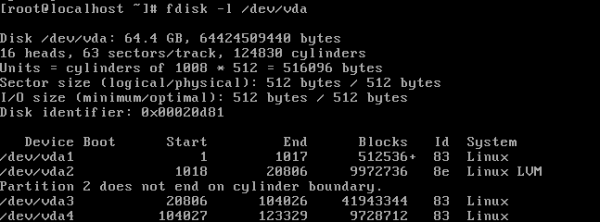
fdisk -l /dev/vda
Now, you will see the following new partition below,
staring at partition 4, you will see the new 9500G partition (but do not delete partition to create the new drive, you will most likely see hell), now you will need to reboot your VM!
Initializing the new partition for use with LVM
Once you have rebooted your vm, we should have a new partition, lets initialize it for use with LVM by
<pre class="brush: php; title: ; notranslate" title="">
pvcreate /dev/vda4
once this is done, you will get the following message
<pre class="brush: php; title: ; notranslate" title="">
Physical volume "/dev/vda4" successfully created
Now, if you hit
<pre class="brush: php; title: ; notranslate" title="">
vgs
it will display the volume group details and if u click on
<pre class="brush: php; title: ; notranslate" title="">
lvs
it will display the logical volume details. These is needed for you to find out where your root partition is located.
Extending logical volumne
Now, to extend the logical volume, we will hit below,
<pre class="brush: php; title: ; notranslate" title="">
vgextend VolGroup /dev/vda4
This will add the new disk/partition to our intended volume group “VolGroup”. Double-check by hitting the following command,
<pre class="brush: php; title: ; notranslate" title="">
vgdisplay
and it should display the group name "VolGroup" with other new parameters, including the number of free PE (physical extents). Now we can increase the size of the logical volume our root partition is on as shown below,
by using the command,
<pre class="brush: php; title: ; notranslate" title="">
lvextend -L +9.5G /dev/mapper/VolGroup-lv_root
We are almost done now: we just need to tell the guest that the root partition has increased in size, and this can be done live since we are doing this using lvm! Now, we will resize the logical volume by doing this,
<pre class="brush: php; title: ; notranslate" title="">
resize2fs /dev/mapper/VolGroup-lv_root
And if you are using Centos 7, try the following instead,
<pre class="brush: php; title: ; notranslate" title="">
xfs_growfs /dev/mapper/VolGroup-lv_root
And we are done! Now, check it out at
<pre class="brush: php; title: ; notranslate" title="">
df -kh
and our kvm has been resized!


