10 different ways to fully utilise the blend tool in Adobe Illustrator

I've talked about how amazing and underused the blend tool in Illustrator is. Here are ten ways to fully utilize the blend tool to create many different kinds of effects in Illustrator.

Blend and mask yourself a great poster

Blend and Mask Yourself a Great Poster - Vectortuts+_1248254360961

Do you think it's difficult to create a poster with an effect just like the one above? Think again! It's really not. The blend tool was used to create the swirly effects in the background of the poster which would have otherwise been dull and flat.

Illustrator Blend Tool Tips and Tricks

Illustrator Blend Tool tips and tricks — Gurus Unleashed_1248254594841

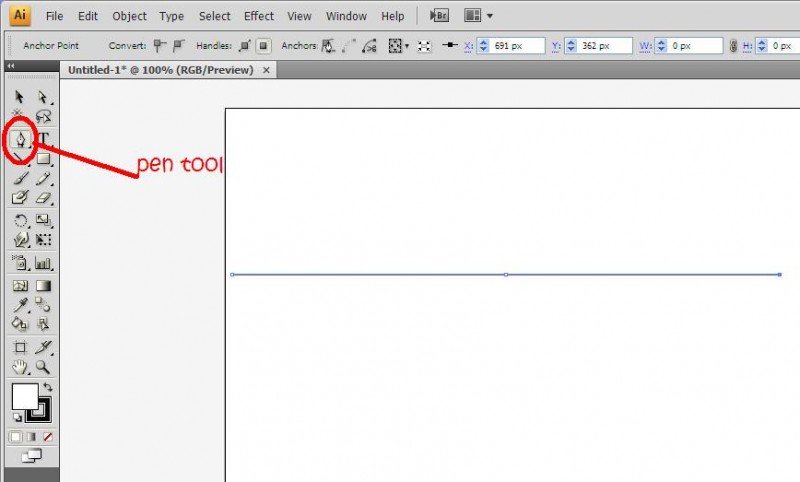
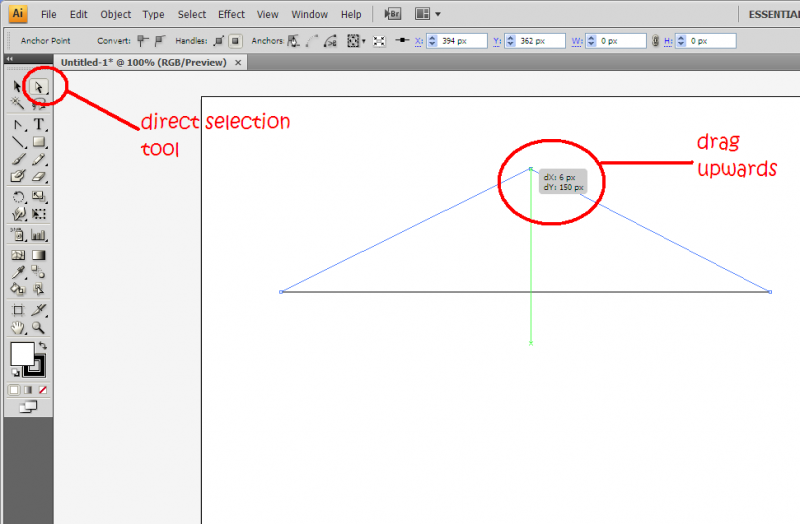
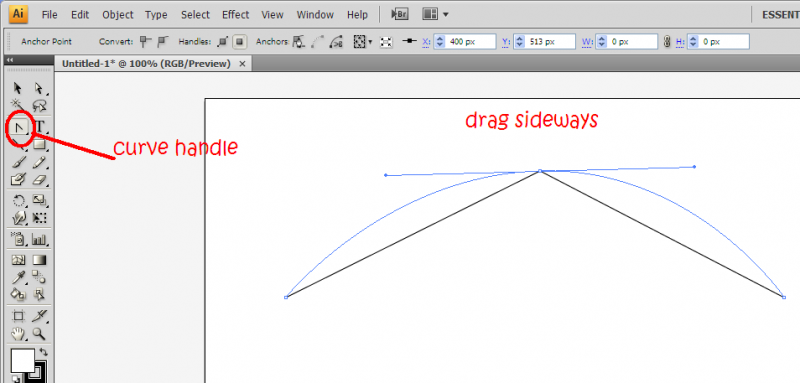
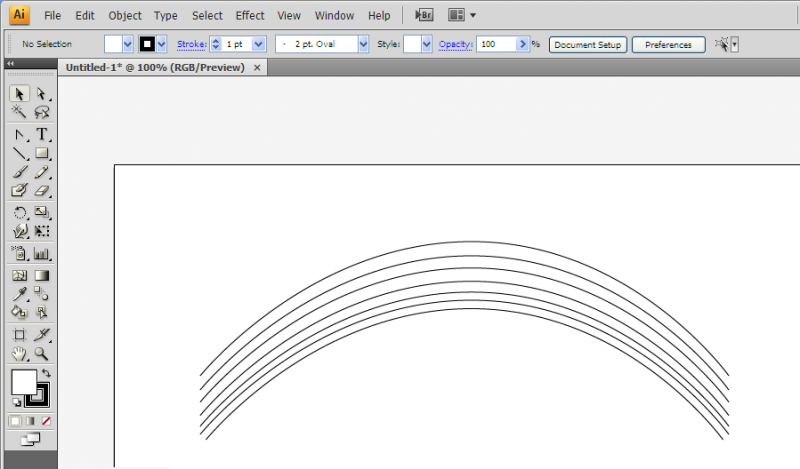
Over at Guru's Unleashed, the tutorial teaches you how to edit the blending spine so you can blend in curves or in any other direction that you would like.

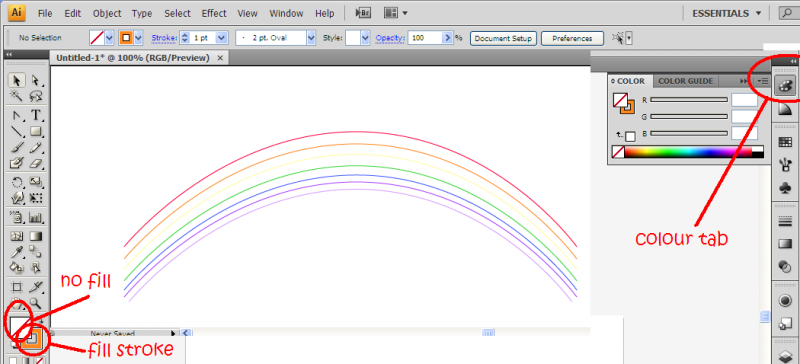
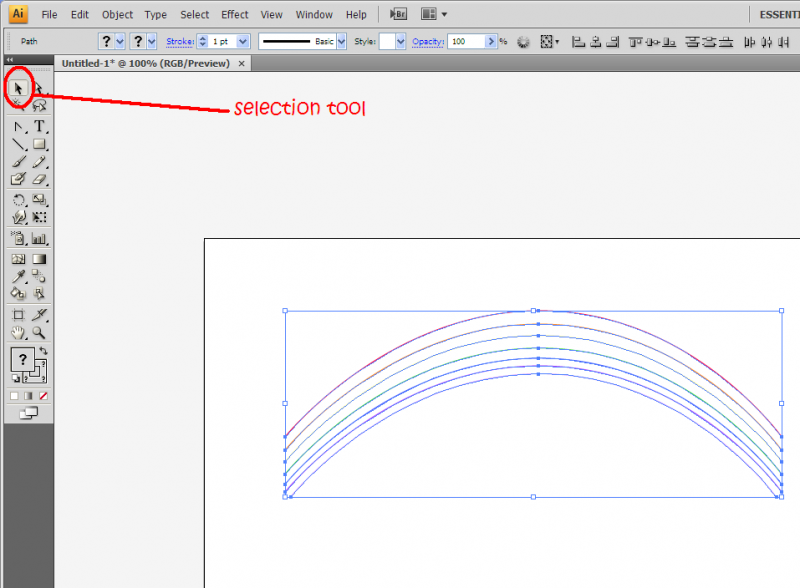
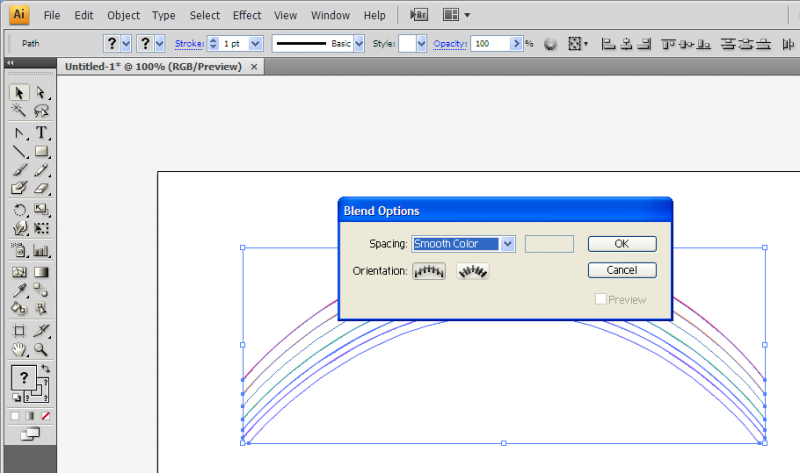
Illustrator's Blend Tool: A Comprehensive Guide

Illustrator’s Blend Tool- A Comprehensive Guide - Vectortuts+_1248254852526

This guide teaches you how to blend with various shapes and gradients, applying blends along a path, replacing spine option, replacing a spine or creating highlights like the picture above. Very useful and reccomended for beginners who did not know the full potential of the tool.

Creating a Stylish Vector Flower

Stylish Vector Flower_1248254509264

The blend tool technique makes creating vector images like the flower above VERY simple to do- not to mention that it looks great. NDesign studio teaches you how.

Creating Vector Gradient Patterns

Tutorial- Creating Vector Gradient Patterns - TheVectorLab Blog_1248254455784

Creating vector gradients like the ones above is easy! All it takes are four steps and there you have it. The vector lab shows you how.

Once the blend tool has been sufficiently mastered, it can be incorporated with other tools to create other images such as the ones below.

Swirl mania in Illustrator

Young_designerZ- Swirl Mania in Illustrator & Photoshop_1248254967449

The swirls and spirals in the picture can be created using the blend tool along with the pattern details on them.

Che Mondo Bello: Tutorial in Illustrator Blends

Che Mondo Bello- Tutorial- Illustrator Blends_1248255574999

Again, this image shows a perfect example of how an image is livened up with the details in the background created with the blend tool.

Amazing Illustrator 3D Effects

Illustrator Amazing Illustrator 3D Effects And PS Brush Creation Tutorial - Online Tutorials. Online Photoshop Tutorials, Online Flash Tutorials. Submit Tutorial_1248255465986

Starting with a relatively flat image of a text, by using the blend tool, a 3d effect can be obtained. With a little help from Photoshop, the result is the image such as above.

Creating an abstract flower using Blend Tool

Photoshop Blog- Abstract Flower Colors Light with Blend tool photoshop_1248255875762

This tutorial is a step-by-step article on how to create an abstract flower such as the one above using the blend tool. I particularly liked this one the best. A great example of a simple and yet so beautiful image that is easy to do.

Creating gradients with the blend tool

Dabbling in Design » Blog Archive » Blending, shading and the blend tool in Illustrator_1248255956421

The jellybeans above all look relatively 3d with the help of the blend tool which would have otherwise been a very flat image.

Tutorial: How to draw cartoon eyes using Adobe Illustrator

Beginners in Illustrator or any form of drawing platform would know just how difficult it is to draw the eyes of their character. I particularly suck at it, and I've recently figured out how to do a simple eyehack, if you will. I've cheated and used this same technique many many times in my illustrations.

circle1

First of all, using the Ellipse tool, draw out a circle about 50 pixels in diameter. The size does not really matter since they are vector eyes and can be resized infinitely. It just depends on how big you want your eyes to be.

circle2

Pick a nice colour to fill the ellipse. I picked a nice shade of green. Keep the border to be black.

circle3

Next, using the ellipse tool, draw a smaller circle, which is black inside and out.

circle4

Position the black circle somewhere in the middle of the green circle. It does not have to be exactly in the middle.

circle5

Finally, draw another ecllipse, make it slightly oval this time, smaller than both the ellipses. Fill it with white. The border should be white too. Position it such that it overlaps the black and green circle.

There you have it, one eye! Simple and easy.

Duplicate the technique to create the other eye but place the white ellipse in the other direction so that they won't look weird. Here's an example of what it looks like on my cartoon character.

mouse

Another use for Adobe Illustrator: Drawing maps and floor plans

Illustrator isn't just used for sketching and drawing, it can also be used for drawing maps and floor plans! Adobe Illustrator CS4 is pretty neat for close-to-accurate illustrations as it has dynamic smart guides to speed up positioning and alignment of objects.

Anyway, recently, I had to do a floor plan for one of my assignments in my university. My current assignment is to perform a safety audit with my group members, on the biochemistry laboratory in my school.

Since the floor plan was not available, we had to manually draw it by ourselves.

I thought Adobe Illustrator is quite useful and efficient for this task.

I just scanned in the hand-sketched plan into my computer, placed it in the first layer, and drew over it on the second layer. Pretty fast and easy!

The final product:

I realised, it can also be good for drawing maps! For example if you wanted to lead someone to your home, but it’s not very well known to be recognised in google map like other landmarks, you can easily use the same technique i used above to illustrate a map to your destination.

For example, my house is the one circled in red above and I wanted to lead people there because I am having this majorly awesome party. Problem is, no one knows how to get there because it’s in the middle of nowhere.

Just print screen that map in satellite format in google maps, and place it the first layer in Illustrator.

Open up a new layer and place this above the map layer. Draw major landmarks, highways, housing areas, major buildings and ignore bushland and terrain. Oh and remember to label what you draw.

Add in arrows to give direction.

After you’re done, just delete the first layer, and you have your map!

How to draw a rainbow with Adobe Illustrator

straight line with illustrator using pen tool

1. First, using the pen tool, draw a straight line with three anchors. I had a radius of 297 px so a total distance of 594px

rainbow2

2. Next, using the direct selection tool (A) click on the middle anchor and drag it upwards. I dragged up about 150 px from the original distance.

rainbow3

3. Using the curve handle (under the pen tool), drag the middle anchor sideways so you get a nice curve.

duplicate 7 times

4. Duplicate this seven times, one for every colour of the rainbow 😉 Be sure to reduce the gaps as you go along because red is the most visible the purple the least. You might want to use the direct selection tool to bend the curves a bit as you go along arranging the curves.

fill in colour

5. Colour each stroke from the top to the bottom as follows: Red>orange>yellow>green>blue>indigo>violet. No brownie points given as to why.

select all

6. Using the selection tool (V), select all the paths

rainbow8

7. Next, go to Object>Blend>Blend options and choose smooth colour. Then, go to Object>Blend>Make (Alt+Ctrl+B)

rainbow

There you have it, your own rainbow!

Tutorial: How to draw a flower petal using Adobe Illustrator

This is a tutorial on how to draw a simple flower petal using Adobe Illustrator. I use Adobe Illustrator CS4, but most of the tools are the same in the earlier versions.

With the pen tool, draw a triangle. Join all the dots.

triangle

Then select the path with the selection tool (V) and clicking on swatch, select a gradient filled swatch to fill in the triangle. Illustrator is annoying in a way that it doesn't allow you to fill in a coloured gradient just by clicking on gradient.

gradient-filled swatch

Next, click on gradients (Window>Gradients). Select the linear gradient. I chose a light pink (double click on the square on the gradient bar to choose the colour) followed by a darker pink on the gradient bar. I then changed the angle of the gradient to -98 to that the light pink is at the tip of the triangle.

fillgradientcolour

Next by clicking on the curve handle tool, which is hidden under the pen tool (hold the click of the pen tool and choose the curve handle). I click on the anchor on the bottom left of the triangle and drag downwards. This would result in a curved path.

flowerpetal4

I then click on the right anchor and drag it upwards instead of downwards. You should adjust so that the petal shape that you want is achieved.

rightanchor

If the tip of the petal is too sharp, use the curve handle to change the shape. In the end, you get a petal that looks like this!

complete flower petal

You can do countless things with this. I duplicated it five times and rearranged it to look like a flower, or you can even duplicate it and rotate it around to achieve the image of falling petals.

complete flower