GITLAB ERROR “FATAL: THE REMOTE END HUNG UP UNEXPECTEDLY”

If you are setting up your gitlab behind an apache server as described on my previous article, you will soon find out that you cannot push up your code into your gitlab and gitlab will throw you the following error

➜  test git:(master) ✗ git push -u origin master
Counting objects: 300, done.
Delta compression using up to 4 threads.
Compressing objects: 100% (290/290), done.
Writing objects: 100% (300/300), 19.19 MiB | 3.83 MiB/s, done.
Total 300 (delta 14), reused 0 (delta 0)
error: RPC failed; result=22, HTTP code = 502
fatal: The remote end hung up unexpectedly
Everything up-to-date

However, if you try to push a single file change, you can safely push the code without getting any kind of annoying errors.

Solution

In order for you to push your code into your gitlab apache setup you will need to do 2 things.

Firstly you will need to run the below code on your client side (your computer!)

git config http.postBuffer 104857600

And the second steps you will need to do is to increase the timeout on gitlab! On the server, open the file unicore.rb

vim /home/git/gitlab/config/unicorn.rb

and look for the line

 38 # NOTICE: git push over http depends on this value.
 39 # If you want be able to push huge amount of data to git repository over http
 40 # you will have to increase this value too.
 41 #
 42 # Example of output if you try to push 1GB repo to GitLab over http.
 43 #   -> git push http://gitlab.... master
 44 #
 45 #   error: RPC failed; result=18, HTTP code = 200
 46 #   fatal: The remote end hung up unexpectedly
 47 #   fatal: The remote end hung up unexpectedly
 48 #
 49 # For more information see http://stackoverflow.com/a/21682112/752049
 50 #
 51 timeout 30

at line 30, you will see that you will need to change this number to something bigger, for my case, i changed it to 3600 (1 hour)

 38 # NOTICE: git push over http depends on this value.
 39 # If you want be able to push huge amount of data to git repository over http
 40 # you will have to increase this value too.
 41 #
 42 # Example of output if you try to push 1GB repo to GitLab over http.
 43 #   -> git push http://gitlab.... master
 44 #
 45 #   error: RPC failed; result=18, HTTP code = 200
 46 #   fatal: The remote end hung up unexpectedly
 47 #   fatal: The remote end hung up unexpectedly
 48 #
 49 # For more information see http://stackoverflow.com/a/21682112/752049
 50 #
 51 timeout 3600

after you have updated this value, you will need to restart gitlab!

root@monitor [/etc/httpd/conf]# service gitlab restart
Stopping unicorn:                                          [  OK  ]
Stopping sidekiq:                                          [  OK  ]
Starting unicorn:                                          [  OK  ]
Starting sidekiq:                                          [  OK  ]

Once you restarted gitlab, try to push your code again, you should be getting this

➜  test git:(master) ✗ git push -u origin master
Counting objects: 300, done.
Delta compression using up to 4 threads.
Compressing objects: 100% (290/290), done.
Writing objects: 100% (300/300), 19.19 MiB | 5.29 MiB/s, done.
Total 300 (delta 14), reused 0 (delta 0)
To http://git.test.com/claylua/test.git
 * [new branch]      master -> master

don't you just hate apache when everyone is using nginx for gitlab? haha..

*************************************** UPDATE ********************************

*shy* i'm also using nginx now lol for reverse proxy... if everything above doesn't work, go to your nginx configuration and adjust your client_max_body_size

http {
    # ...
    client_max_body_size 16M;
    # ...

increasing this will allow your data to be send over to your server safely!

Facebook – permission is reserved for apps that replicate the Facebook client on platforms without a native client

If you are getting an error from Facebook when applying for extended permission such as "user_groups" and u get the following error

The user_groups permission is reserved for apps that replicate the Facebook client on platforms without a native client. You can find more information here.

chances are you are pretty f**k up by Facebook. What does this means and what the hell is this? Google it around and i couldn't find a solution to this issue but at the end i manage to ask people in the Facebook Developers group and this is what i got.

@Credit to its respective @Andreas Teufel and @Christoph Broeckmann

Christoph Broeckmann If there is a device like say a mobile phone that does not have a native Facebook client, and you want to write one that brings FB functionality to that device, then your app can get that permission. Otherwise, it can’t.
Or to put it short: “Normal” apps will not get that permission granted.

and

Andreas Teufel ...or a TV, for example.

Putting it in short, if you are getting the error "permission is reserved for apps that replicate the Facebook client on platforms without a native client", the chances of you getting your permission approve because you need it for an app or website are pretty close to never.

This pretty much means that Facebook is trying very hard to protect its data and its platform by restricting your access to their data as much as possible. In that case, i really don't see how and why people will want to create a facebook app when they are kinda restricted in everything. And did you know if you read up their platform policy you'll find pretty interesting stuff to make you stop developing your facebook app almost immediately! Here's a little snippets,

Screen Shot 2014-07-15 at 5.33.34 PM

well, as you can see, its pretty disappointing looking at how much time you spend building an app with Facebook and get slap on your face when they decides to change their policy to protect their data! Guess, it's time to move on to other platform! ha!

Easily Integrate PayPal IPN in Yii Framework

Wonder how to integrate paypal IPN in Yii framework? Are you searching for Yii extension to integrate paypal IPN into your application? Well, i used to do that until i got fed up with reading all the documentation all excessive code dated by 2012 that hasn't been update for months! So i decided to just integrate paypal ipn alone into my Yii framework and guess what, it was so dead simple that it simply doesn't need any extension to began with.

PayPal IPN Tutorial

Before i began writing this tutorial, you should really understand what is paypal ipn is and why you are integrating it. Paypal IPN refers PayPal's Instant Payment Notification (IPN) which is a service provides by paypal to instantly notify your application whenever there is a payment made to you. And Micah Carrick had explained it perfectly on how to integrate it on a PHP level.

Coding Paypal IPN in Yii Framework

Here we go, firstly, you will need to get the code PHP-PayPal-IPN from github. The library provides you with a simple integration to Paypal IPN. Download the code and placed into your project/protected/vendors/PHP-PayPal-IPN and rename the ipnlistener.php to IpnListener.php.

Next, you will need to create a controller to listen to incoming ipn request and paste the following code into your listener method.

{
class PaymentController extends Controller{
        public function actionListen(){
                // intantiate the IPN listener
                Yii::import("application.vendors.PHP-PayPal-IPN.*", true);
                $listener = new IpnListener();

                // tell the IPN listener to use the PayPal test sandbox
                $listener->use_sandbox = true;

                // try to process the IPN POST
                try {
                        $listener->requirePostMethod();
                        $verified = $listener->processIpn();
                } catch (Exception $e) {
                        // error_log($e->getMessage());
                        Yii::log("IPN FAILED! returned an error: $e",CLogger::LEVEL_ERROR);
                        Yii::app()->end();
                }

                // TODO: Handle IPN Response here
                if ($verified) {
                        $model = new Transaction('search');
                        $model->attributes=$_POST;
                        $model->save();
                        // TODO: Implement additional fraud checks and MySQL storage
                        mail('[email protected]', 'Valid IPN', $listener->getTextReport());
                } else {
                        // manually investigate the invalid IPN
                        mail('[email protected]', 'Invalid IPN', $listener->getTextReport());
                }
        }

}

Do take note that you will need to give your method public access in order for paypal ipn services to reach it. Now, take note that the model i am using here belongs to my own, you can create your own and save every single data passed in by paypal to your database like what i did but do make sure that the naming convention are the same for both paypal $POST request and your own table fields.

Test Paypal IPN

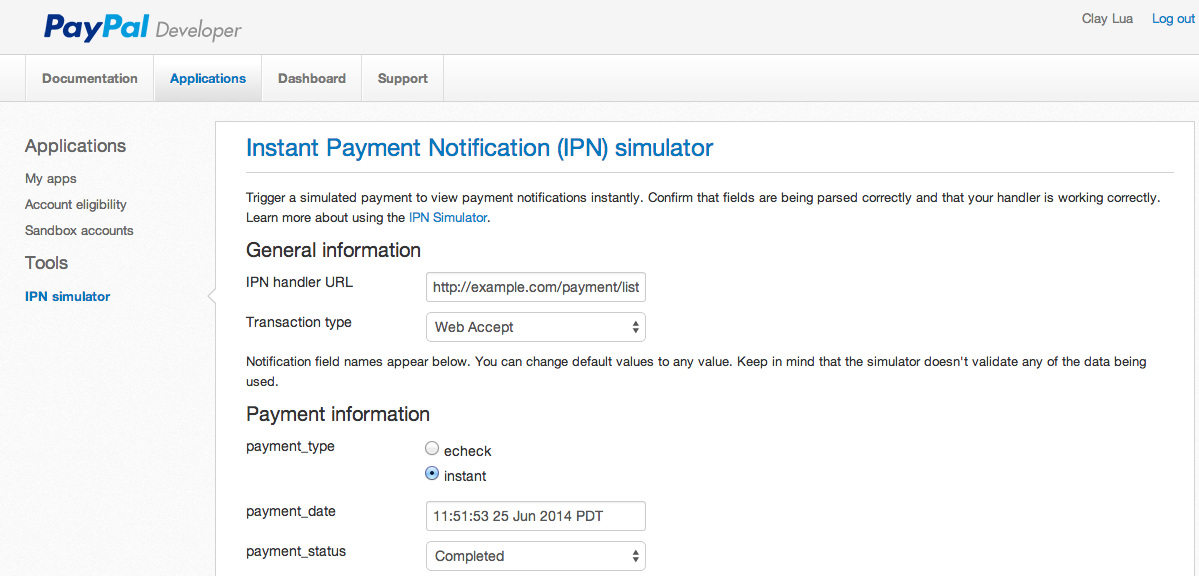
In order to test your Paypal IPN request, you will need to create a sandbox paypal account and use its Instant Payment Notification (IPN) Simulator as show below,

Screen Shot 2014-06-26 at 2.52.33 AM

All you need to do is to scroll it all the way down and click "Send IPN". And you should be able to test your Paypal ipn listener! And guess what? You don't even need to create any sandbox paypal account to create a paypal IPN listener!

Varnish 403 Error – error on page

You have installed varnish into your web server and being happy with it for a few days and suddenly one day you found out that your page is showing an error page with the text "error" on it. And that kept you wonder why is varnish showing error page and after restarting your varnish it is still showing error.

A quick investigation on the http header sent over from the server shows that varnish is serving 403 error page to our visitors! Why?!

Why Varnish serving 403 error page

There are plenty of reasons why varnish is serving a 403 error page but most likely that your backend is only returning 403 once, but then Varnish is caching it for future requests. Some times it happens so we have to explicitly ask Varnish 3.0 to not cache any error pages. On vcl_fetch section, you might want to add the following to prevent it from caching all error page on varnish 3.0.


if (beresp.status >= 400) {
return (hit_for_pass);
}

But if this is not the case, there is also possbility that 403 points at your backend telling varnish it is forbidden. If varnish is giving you that error then it is working and the backend is giving it 403. Most likely this is caused by the backend apps use some sort of rate limiting per ip as by default when you add varnish to an existing setup the ip that gets passed to the backend is the varnish ip not the source ip. In that case you should update the X forwarded by adding the below code to vlc_recv section,

  remove req.http.X-Forwarded-For;
  set req.http.X-Forwarded-For = client.ip;

The above code ensure the correct client ip is being passed into varnish and prevent itself from throwing 403 error!

Creating Virtual Host on Nginx Web Server with Example in Centos

Actually this is a the continue part of my previous post which explains how to setup a LEMP server but the tutorial never actually teaches the user how to setup a virtual host for each of their website but this should be pretty straight forward and i am going to show you how this can be done.

Setup Virtual Host Directory

Before we go into nginx configuration, we will need to setup the location where we want our website files to be located. In this case, i have decided to just throw them into /var/www (you can do ln -s /var/www /home/www if you want it to be in /home in a later stage) but the folder isn't available so i will have to setup these virtual host folder myself.

sudo mkdir -p /var/www/monitorboard.com/html

You will need to designate an actual DNS approved domain, or an IP address, to test that a virtual host is working. In this tutorial we will use example.com as a placeholder for a correct domain name.

However, should you want to use an unapproved domain name to test the process i'll explain it later too.

Granting Permission to our Virtual Host Directory

Since we created our directory using a root account, we will have to change it to its rightful owner and in this case, it will be 'nginx' as shown below

sudo chown -R nginx:nginx /var/www/monitorboard.com/html

Additionally, it is important to make sure that everyone is able to read our new files so we have to correct its permission to 755

sudo chmod 755 /var/www

And we are done with permission!

Nginx Virtual Host

To setup your nginx virtual host, you will need to open up nginx virtual file located at /etc/nginx/conf.d/virtual.conf and you will need to update it with the following configuration

server {
    listen       8080;
    server_name  monitorboard.com www.monitorboard.com;
    root   /var/www/monitorboard.com/html;
    index  index.php;

    location / {
        try_files $uri $uri/ /index.php?$query_string;

    }
# Logging --
    access_log  /var/www/monitorboard.com/access.log;
    error_log  /var/www/monitorboard.com/error.log;

# serve static files directly
    location ~* ^.+.(jpg|jpeg|gif|css|png|js|ico|html|xml|txt)$ {
            access_log        off;
            expires           max;
    }

    include /etc/nginx/conf.d/global/security.conf;
    include /etc/nginx/conf.d/global/cache.conf;
    include /etc/nginx/conf.d/global/php-fpm.conf;
    include /etc/nginx/conf.d/global/status.conf;
    include /etc/nginx/conf.d/global/wordpress-w3-total-cache.conf;
}

As you can see, i've setup my domain to the folder /var/www/ instead of the default placement of /usr/share/nginx/html which means that this domain will read from the folder /var/www/monitorboard/html instead of anywhere else! Port 8080 is being used because we have varnish installed in our server as shown on our previous tutorial of how to setup a LEMP server.

Lastly all the include file can be get from nicolargo github. This will ensure that all our PHP files can be run off our nginx server but before anything can be run, we will need to restart our nginx server and php-fpm service.

service nginx restart
service php-fpm restart

This will ensure our setup is being updated on our machine.

Fake domain testing

In the case monitorboard.com isn't own by you, you will need to setup your hosts file to reflect your machine to redirect all request to your web server. Assuming your webserver ip is 1.1.1.1, you will need to update your hosts file in your computer/machine located in /etc/hosts and add in the following config

# Host Database
#
# localhost is used to configure the loopback interface
# when the system is booting.  Do not change this entry.
##
127.0.0.1       localhost

#Virtual Hosts 
1.1.1.1    www.monitorboard.com 

Now, if you open up your browser and hit 'www.monitoboard.com', you should be able to test your nginx configuration that you have done on your web server at 1.1.1.1 🙂