Recently i got my hand on a Ubuntu USB installation drive from my friend. I was excited to get this Ubuntu into my Virtual Box but found out that the virtual box doesn't seems to like USB drive very much and only wants ISO or CD copies! I finally manage to get this thing work after some try and so i decided to write this down in case i want to do such stupid thing again.
Environment
Before is starts let's look at my environment.
- Windows 7
- Virtual Box v3.2.12
- Ubuntu 10.10
I think that's about it.
Physical Disk on Virtual Box
Since virtual box does not know where to look at we have to specifically tell it to look at our hard drive. In order to do this we have to first know where is our current hard drive located (which parking slot). In Windows 7 or any windows environment you can easily find this by typing 'diskmgmt.msc' on the run section when you press Ctrl+Shift+Esc. You should see this below,
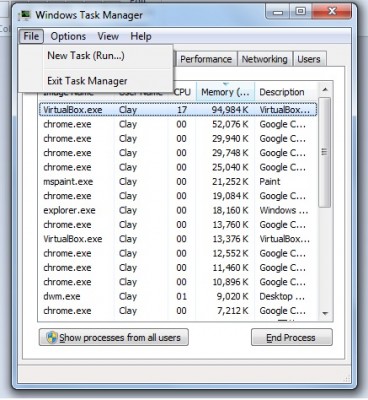
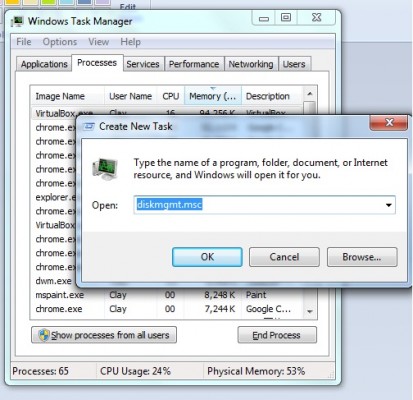
Once you clicked ok, the disk management tool box should appeared and you should take note of your disk location which is highlighted in red for my case.
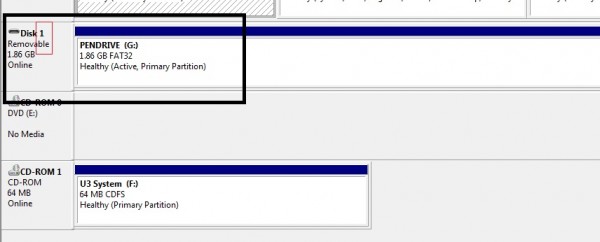
Once you have done all these, you should have a clear idea where is your parking slot (drive location). Next we will need to create this physical location for our Virtual box to read.
You all might be aware that starting from Window Vista, most of our files are being protected. In order to create a physical drive, we will need to run our command prompt or terminal by pressing cmd.exe on run or through search (advisable since we want to run our command prompt on administration access).
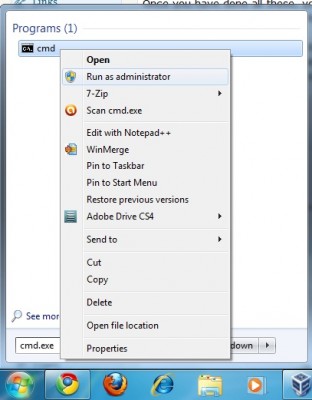
The command prompt should pop out and you should now find the location of your virtualbox installation directory as shown below,
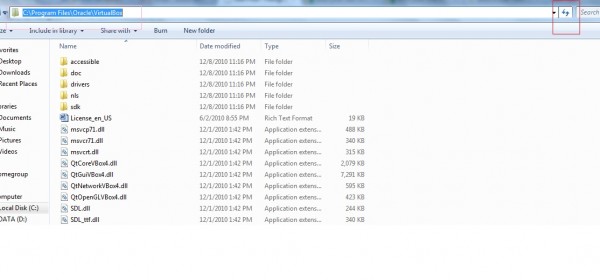
copy the location and paste it into the command prompt with cd infront which will give you this
cd C:\Program Files\Oracle\VirtualBox
Next, copy the following instruction into the command prompt as well
VBoxManage internalcommands createrawvmdk -filename C:\usbdrives.vmdk -rawdisk \\.\PhysicalDrive1 -register
In my case, my parking slot (drive location) was at 1. Hence, the above code writes \\.\PhysicalDrive# will be changed to \\.\PhysicalDrive1 instead of any other number. And "C:\usbdrives.vmdk" is the location i want to save my physical drive to. You should see something like this in your command prompt,
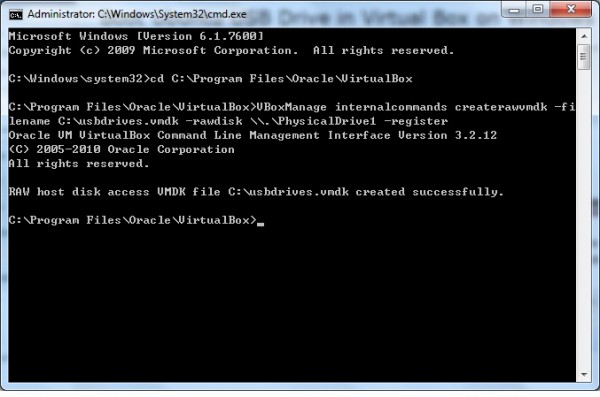
If you see any problem with creating a physical drive, it is most likely due to your permission of your command prompt.
Installation Of Ubuntu using USB Drive onto VirtualBox
Now we are ready to tell our VirtualBox our location of our USB drive. Firstly, you would have to open your virtualbox under Administrator access similarly to the way you open up the command prompt.
Next you would have to setup a new virtual machine and under its setting choose hard drive and select the newly created physical drive file as its IDE Controller.
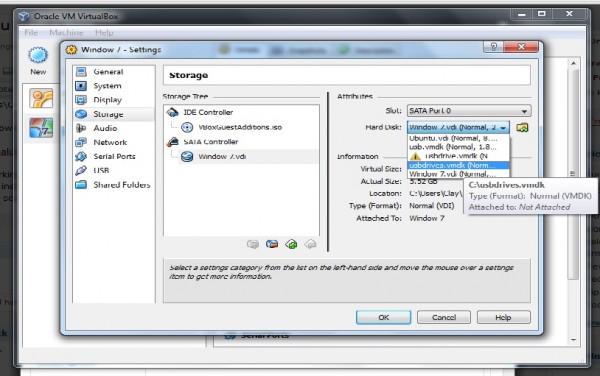
Now start your virtual box and it should starts loading off your thumb drive!!
After installation complete
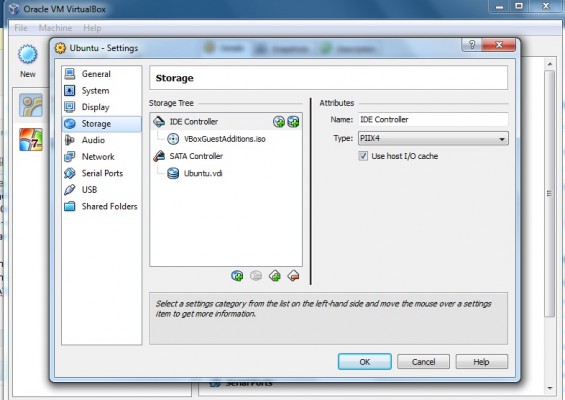
After your installation has complete, do remember to remove your physical drive under setting and select only the Ubuntu.vi on your SATA Controller since your IDE Controller will most likely installed with the VBoxGuestAdditional.iso as shown below,


One thought on “Boot Ubuntu USB Drive in Virtual Box on Windows Environment”
Comments are closed.